Framing is one of the most important aspects of landscape photography. It helps guide the viewer’s eye, creates depth, and makes your photos more engaging. In this article, you will learn practical tips and techniques to frame your shots effectively, so you can bring out the best in every scene.
What framing means in photography
Framing in photography is about how you arrange elements in a photo to direct the viewer's attention and create a sense of structure. It’s not just about what you include in the photo but also how you place it. A well-framed landscape photo draws the viewer in and gives them a clear point of focus, whether it’s a mountain, a tree, or a distant horizon.
Framing is different from cropping. Cropping happens after the photo is taken, while framing happens when you’re setting up the shot. By carefully positioning elements in your frame, you can tell a stronger story and make your photo feel more intentional.
Good framing also helps avoid distractions. Cluttered or chaotic frames can confuse the viewer. Taking the time to organize your shot ensures that every part of the photo adds to its overall impact.
Key principles of landscape framing
Framing a landscape photo is about making thoughtful choices to create balance, depth, and focus. These principles can help guide your composition and make your photos more visually striking.
- Rule of thirds: Imagine your frame divided into a 3x3 grid. Place key elements like the horizon, a tree, or a mountain along these lines or at their intersections. This creates balance and naturally draws the viewer's eye.
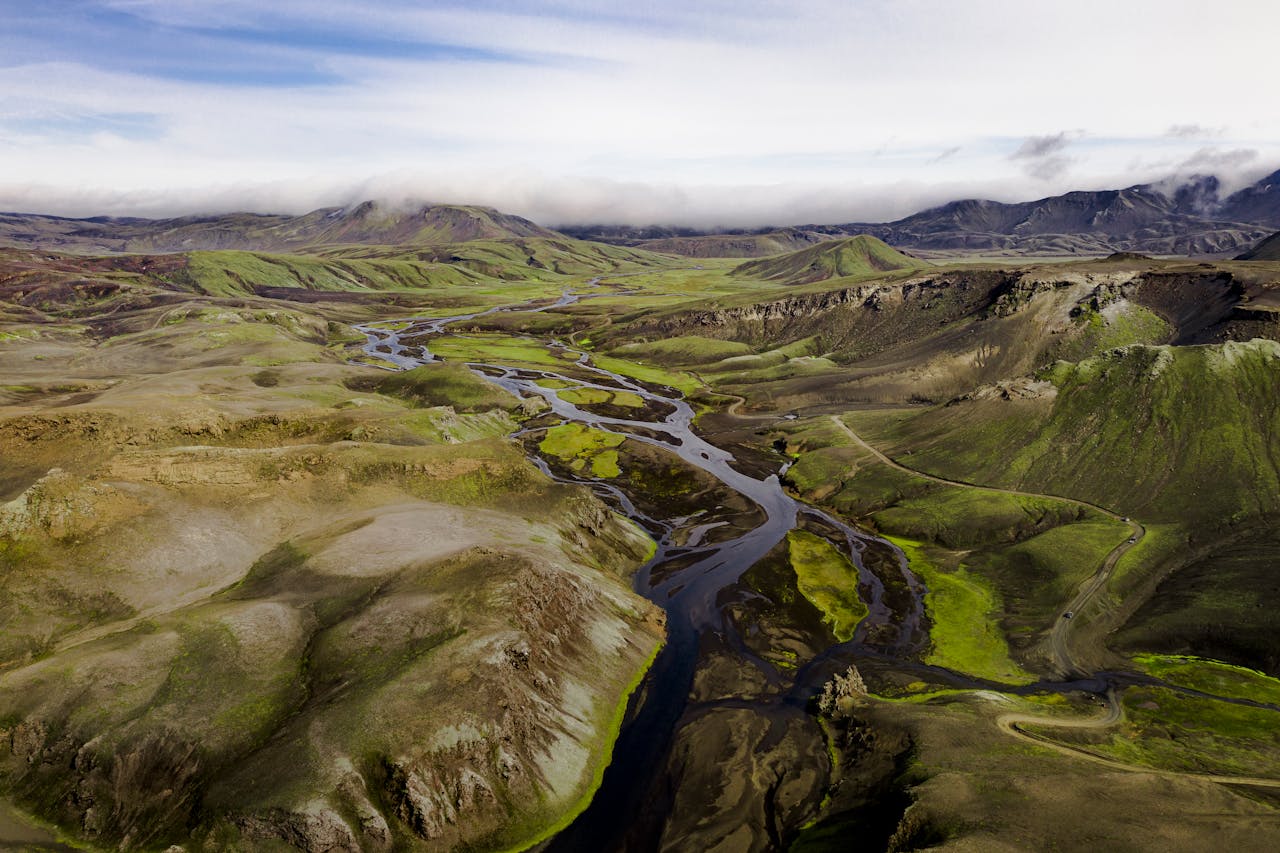
- Leading lines: Roads, rivers, fences, or ridgelines guide the viewer’s eye through the frame. These lines create a visual path that adds depth and directs attention to the main subject. Look for lines that lead toward a focal point, like a mountain peak or the setting sun.
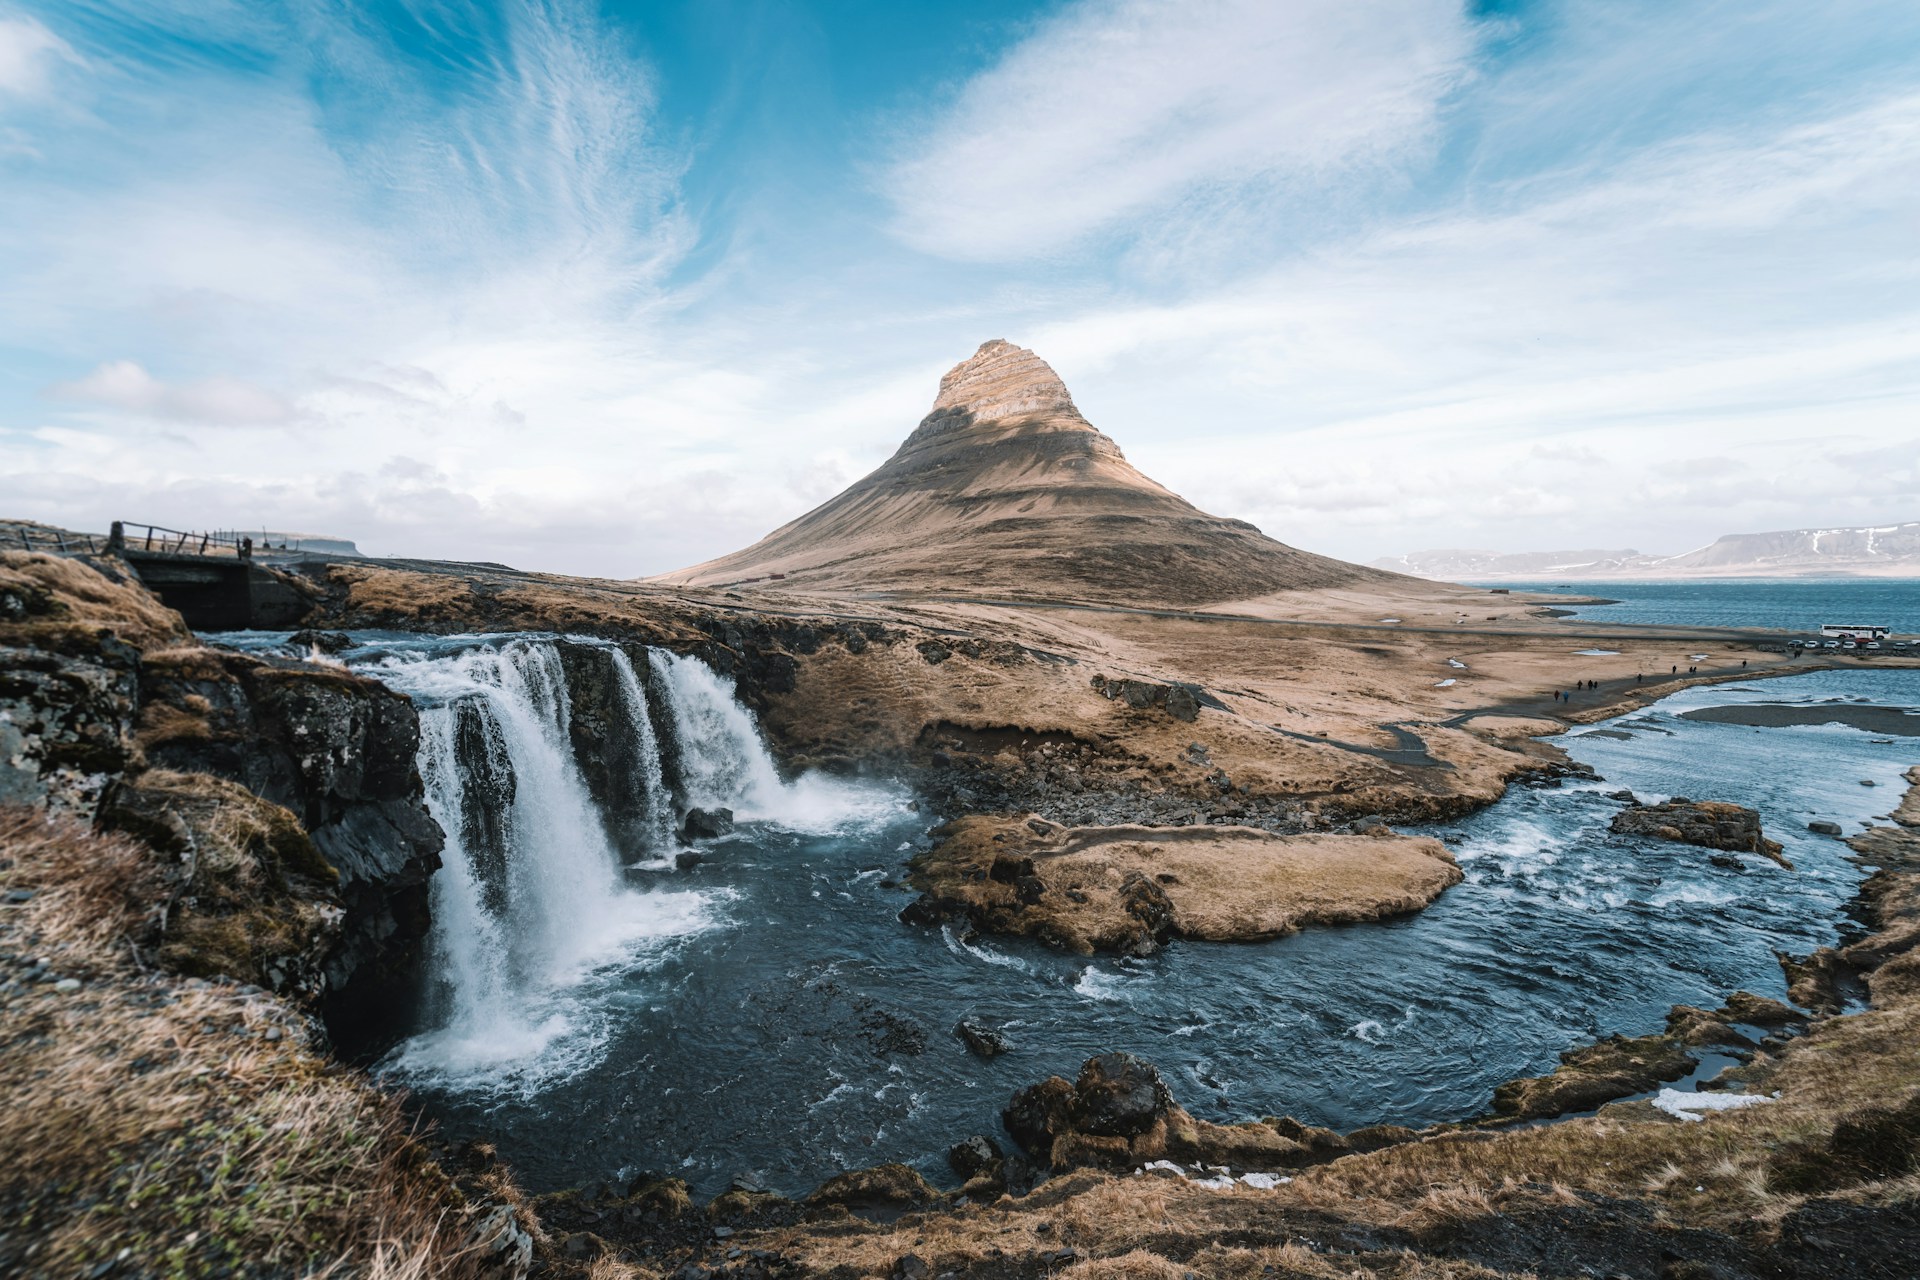
- Foreground, midground, background: A layered composition adds depth and dimension. Include a strong foreground element, like a rock or a flower, to anchor the scene. The midground provides context, and the background offers a sense of scale or distance. This layering helps your photo feel immersive.
- Natural frames: Use elements like arching tree branches, canyon walls, or windows to frame your subject within the shot. These natural frames add structure to your composition and can make the main subject stand out more clearly.
- Negative space: Don’t be afraid to leave parts of the frame empty. Open skies, calm water, or vast fields can create a sense of scale and emphasize the subject. Negative space also gives the viewer’s eye a place to rest, making the image feel balanced.
- Horizon placement: Where you place the horizon changes the focus of the photo. A low horizon emphasizes the sky, perfect for capturing dramatic clouds or sunsets. A high horizon brings attention to the foreground, ideal for showing textures or leading lines.
Once you understand the basics, experiment with different angles, perspectives, and elements to find your own creative voice.
Using natural elements as frames
Tree branches are one of the most common natural frames. Overhanging branches can create a window-like effect that leads the viewer’s eye toward the subject, whether it’s a mountain, a lake, or a sunrise.
To use them well, position yourself so the branches don’t overwhelm the frame but instead subtly outline the scene. Look for interesting shapes, textures, or even leaves catching the light to add extra detail.
Arches, caves, and rock formations are striking natural frames. These structures create a sense of scale and often add a dramatic element to the composition.
For instance, a cave opening can act like a frame for a sunset, making the scene feel more intimate. When using these features, be mindful of your position to balance the frame and avoid cutting off important details.
Water can also serve as a frame. Reflections on lakes or puddles can outline or mirror your subject, creating a natural border that adds symmetry and balance. Look for calm water for a clear reflection, and experiment with angles to get the best framing effect.
Other elements like tall grasses, reeds, or flowers in the foreground can provide subtle framing. By partially enclosing your subject with these features, you create a sense of place and enhance the photo’s mood.
To make the most of these elements, use a wide aperture to blur them slightly, keeping the focus on the main subject while still maintaining the framing effect.
When using natural frames, it’s important to keep the composition clean. Avoid letting the framing element dominate or distract from the subject. The goal is to complement the scene, not compete with it. Paying attention to the edges of the frame can help you avoid clutter or unwanted objects creeping into the shot.
Incorporating the horizon
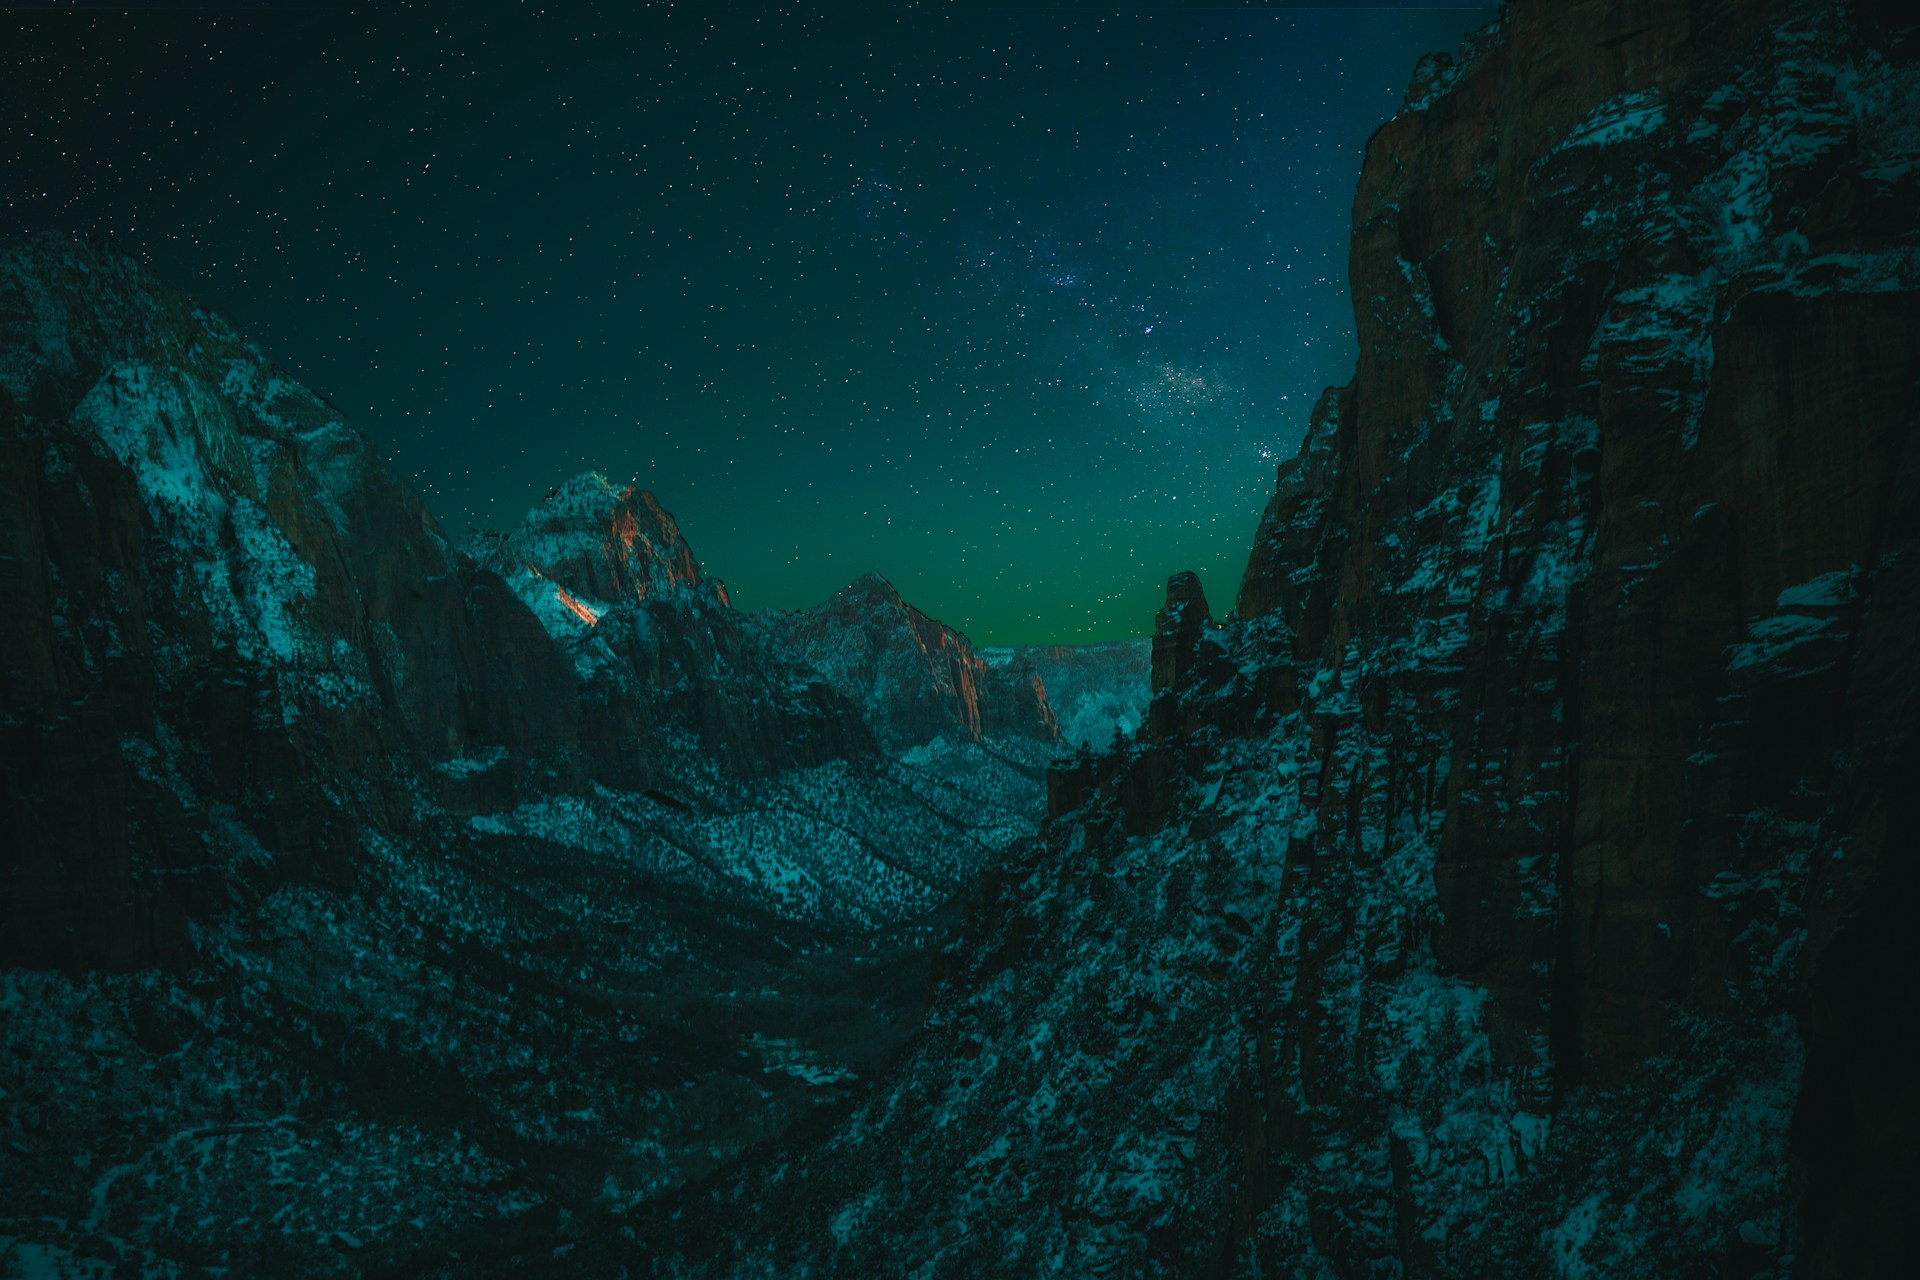
Placing the horizon low in the frame shifts attention to the sky. This works well when the sky is full of dramatic clouds, vibrant colors, or celestial events like sunsets and starry nights. A low horizon allows the sky to dominate the composition, making it the centerpiece of the image.
On the other hand, a high horizon emphasizes the foreground. This is a great choice when the landscape itself has interesting textures, patterns, or details, such as fields of flowers, rippling water, or rocky terrain.
Keeping the horizon level is essential for creating professional-looking photos. A crooked horizon can make a shot feel unbalanced and distract the viewer.
Most cameras have a built-in level or grid that helps you align the horizon during the shot. If you don’t catch it in the moment, you can adjust it during editing, but it’s always better to get it right in camera.
The horizon also helps divide the frame into sections, such as land and sky. When deciding where to place it, think about what you want the viewer to notice first.
If both the land and sky are equally interesting, you can experiment with a centered horizon to create symmetry. However, this approach works best for specific scenes, like reflections in water, where balance is the goal.
Sometimes, breaking traditional rules can lead to creative results. Tilting the horizon slightly can add energy or tension to a photo, especially in scenes with motion, like waves or storms.
Experimenting with depth and scale
Wide-angle lenses are particularly useful for creating depth. They exaggerate the size of foreground elements compared to the background, making the scene appear larger and more dramatic. To make the most of a wide-angle lens, get close to your foreground subject. This creates a stronger connection between the different layers of your composition.
Overlapping elements are another way to show depth. When objects in the scene partially cover one another, it helps the viewer perceive distance. For instance, a row of trees fading into the distance naturally leads the eye and gives the photo a layered look. Be mindful of how these overlaps occur—too much clutter can make the scene feel chaotic, while well-placed overlaps enhance clarity.
Adding scale is about showing how big or small something is compared to a familiar object. Including a person, an animal, or a building in the frame can give viewers a point of reference.
Experimenting with angles and perspectives can also enhance depth and scale. Shooting from a low angle can make foreground elements more prominent, while a higher perspective can flatten the scene and focus on patterns or shapes.
The role of light in framing
Directional light, like that from the rising or setting sun, creates shadows and highlights that add depth to a scene. Side lighting, in particular, emphasizes textures and contours, making features like hills, rocks, or tree bark stand out.
When framing your shot, pay attention to where the light falls and how it creates natural lines or shapes that can guide the eye toward your subject.
Soft light, often found during overcast days or in the golden hours, produces even illumination. This type of light works well for framing because it reduces harsh contrasts, allowing the details in both the foreground and background to be visible.
It’s especially useful when your frame includes intricate elements like flowers, leaves, or water reflections, as soft light enhances their subtleties without overpowering the scene.
Backlighting, where the light source is behind your subject, can create dramatic silhouettes or glowing edges. This technique works beautifully when framing elements like tree branches, tall grass, or people. By carefully positioning yourself, you can use backlighting to frame your subject with a halo of light, adding depth and a sense of wonder.
Light also plays a critical role in emphasizing natural frames. For example, light streaming through an arch or between tree branches can draw attention to the framed subject.
Using shadows creatively can enhance your composition as well. Shadows from mountains, clouds, or structures can act as framing elements themselves, guiding the viewer’s focus or adding contrast to the scene.
The direction, intensity, and quality of light all contribute to how the elements within the frame relate to one another. When used thoughtfully, light doesn’t just illuminate the scene—it becomes a key part of the composition, enhancing the overall impact of your photo.