The calm of the water, reflections, and changing light conditions all play a crucial role in creating compelling images. Whether you're shooting at sunrise or during a storm, understanding how to make the most of these elements is key to getting the perfect shot. In this article, we’ll explore practical tips that will help you capture stunning lake photos, no matter the conditions.
Choosing the right time and lighting
Lighting can make or break a lake photo, and the best time to shoot depends on the mood you want to capture. Here’s how to make the most of different lighting conditions:
Golden hour & blue hour
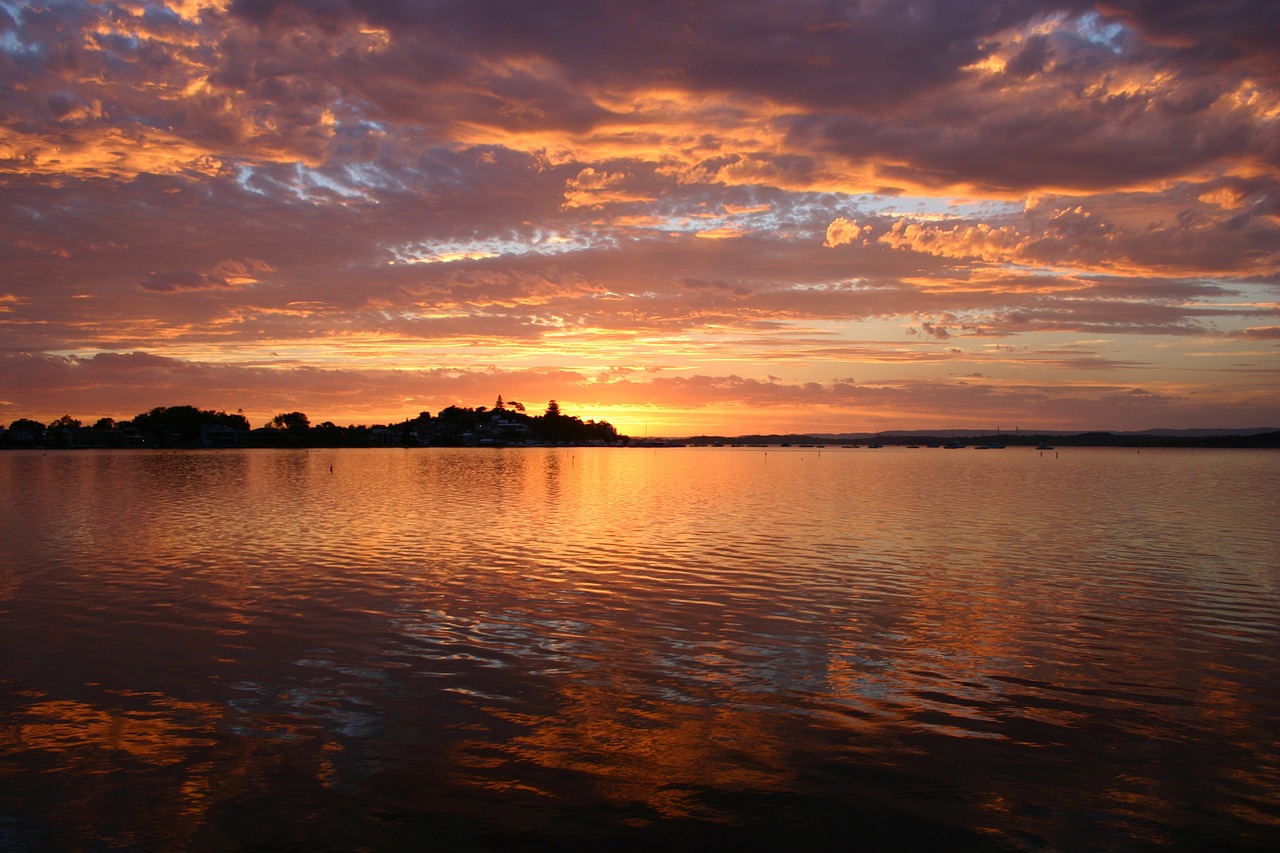
The golden hour, shortly after sunrise and before sunset, gives soft, warm light that enhances textures and colors. The water reflects this light beautifully, creating peaceful and serene images. The blue hour, just before sunrise or after sunset, brings cooler tones that can add a moody or dramatic feel to your shot. These are the ideal times for capturing calm, reflective waters.
Midday lighting
Midday light can be harsh, creating strong shadows and bright highlights that can make your lake scene look flat. If you must shoot during this time, try to find shaded areas or use a polarizing filter to reduce glare from the water's surface. This can help saturate the colors and bring out details that might otherwise be lost in the harsh light.
Weather conditions
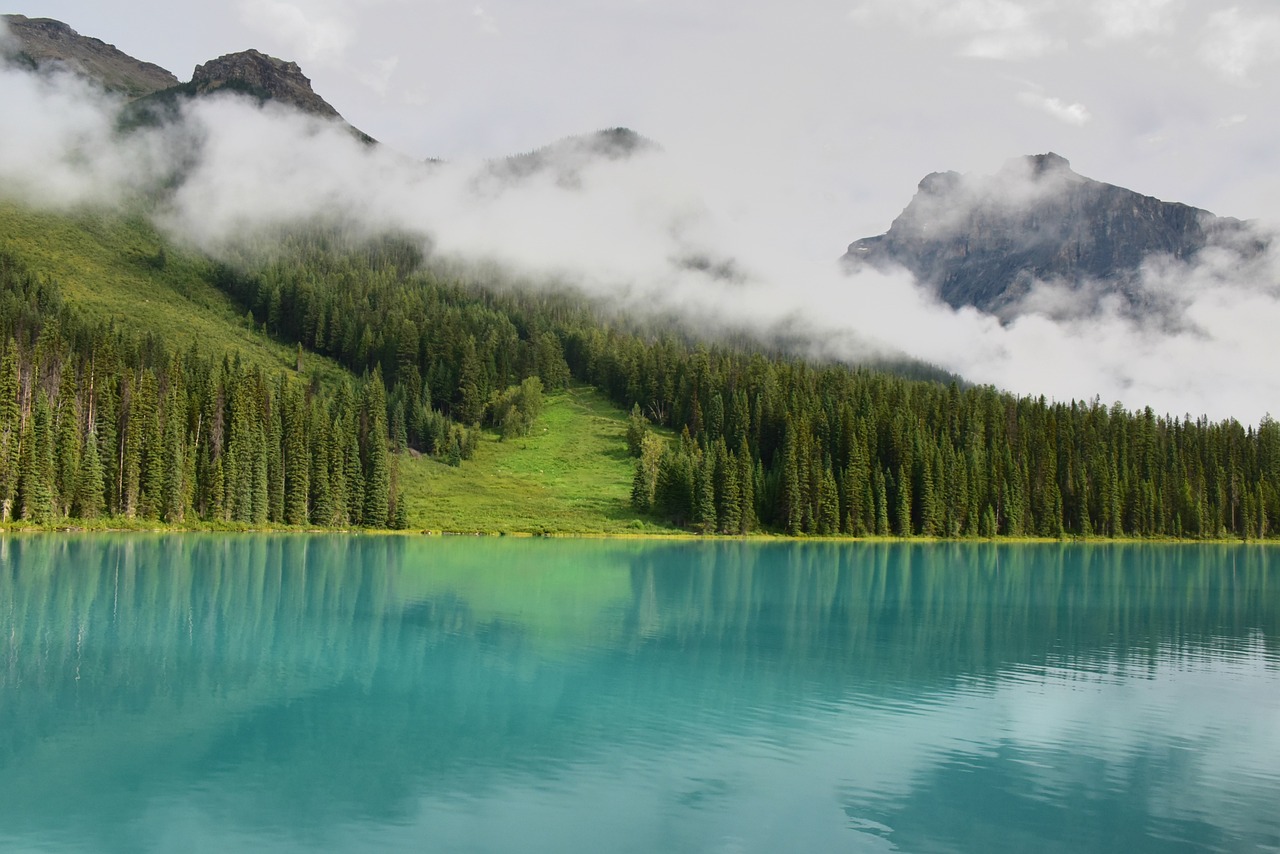
Weather can transform the mood of your photos. Overcast skies often provide even, diffused light that reduces harsh shadows and can create a soft, tranquil atmosphere. Fog can add mystery and depth, blurring the background while focusing attention on the foreground. A stormy sky or dramatic clouds can add intensity and a sense of movement to the image, making for powerful shots that convey emotion.
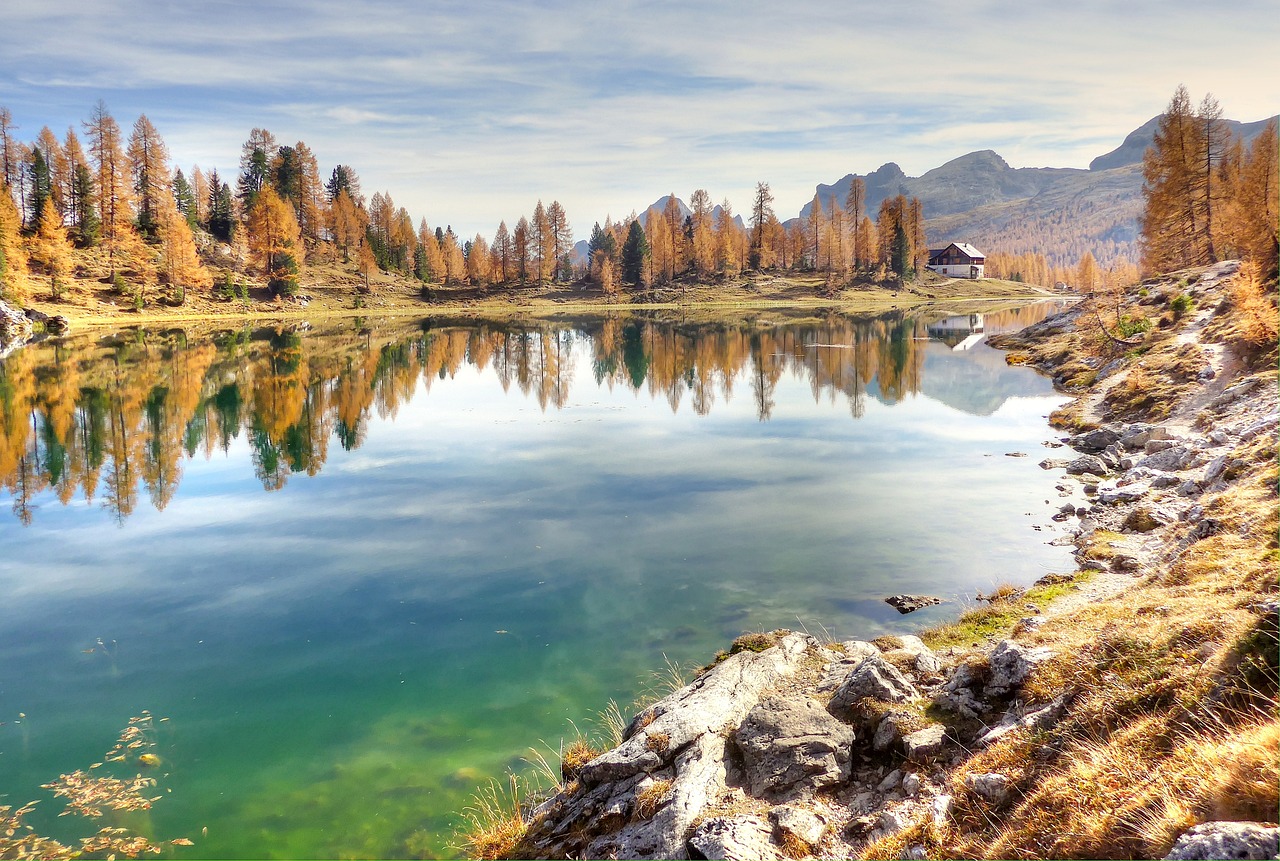
Reflections
The best time for capturing perfect reflections on the water’s surface is when it’s calm—usually early mornings or late evenings when the wind is still. Reflections can double the visual impact of your shot, but any ripples or wind will break them up. If you’re shooting in less-than-ideal conditions, consider adjusting your angle or waiting for the right moment to capture that mirror-like effect.
Understanding your environment
Start by researching the location before you shoot. Look for interesting features like rock formations, islands, or interesting trees that can add depth to your image. A good location with a variety of elements to focus on can make all the difference.
Take note of how the landscape changes with the seasons. In winter, a frozen lake might offer stark, minimalist beauty, while spring can bring vibrant greenery and wildlife. Each season provides new opportunities for creative shots.
Wildlife can also play an important role in lake photography. Birds, fish, or other animals that live near the water can add life and action to your photos, making them feel more dynamic. Pay attention to how wildlife interacts with the environment. Sometimes, a bird in flight over a lake or a deer drinking from the shore can be the perfect touch to elevate a simple scene.
Also, consider how the time of day and weather affects the overall scene. Each condition offers its own potential for creating something striking, whether it’s the mist rising from the water or the way light filters through rain-soaked trees.
Equipment and settings
The environment can be unpredictable, so it’s important to be prepared with the right gear and know how to use it. Here’s a breakdown of what to bring and how to set up your camera for optimal results.
- Lenses: A wide-angle lens is essential for capturing the full scale of a lake landscape, especially if you want to include the surrounding environment. It allows you to fit more into the frame and gives depth to your photos. For wildlife shots or capturing details in the distance, a telephoto lens is helpful. It lets you zoom in without disturbing the animals or losing the natural feel of the scene.
- Tripods: Stability is crucial, especially when shooting during low light conditions or using longer shutter speeds. A sturdy tripod helps eliminate camera shake, ensuring sharp images. When shooting long exposure, like creating smooth water effects, a tripod is indispensable to keep your camera steady.
- Filters: A polarizing filter is a must when shooting lakes. It reduces glare off the water's surface, making the colors more vivid and the reflections sharper. This filter also helps darken the sky, making clouds stand out and giving more contrast to the scene. If you're planning on doing long exposure photography, a neutral density (ND) filter is useful. It reduces the amount of light entering the lens, allowing you to use longer exposures even in bright light without overexposing the image.
- Camera settings: Setting the right aperture, shutter speed, and ISO is essential to capture the most detailed and sharp images. For landscapes, start with a smaller aperture (f/8 to f/16) to get a wide depth of field, ensuring everything from the foreground to the background is in focus. A slower shutter speed (around 1/125 to 1/500) works well for capturing calm water, but adjust based on the light conditions. Keep your ISO low (around 100 to 400) to avoid grainy images, especially when shooting in good light. For long exposure shots, reduce the shutter speed and use a tripod to prevent motion blur.
Don’t forget that experience plays a huge role—over time, you’ll learn how your equipment works in different environments, and that will make you more confident and efficient in the field.
Composition techniques for lake photography
The way you frame your shot can direct the viewer’s attention, create balance, and tell a story. One effective technique is using leading lines, which guide the eye through the image.
For instance, a curved shoreline, a trail of footprints in the sand, or a row of trees can lead the viewer’s gaze from the foreground into the background, creating depth and interest. These lines can make the image feel more dynamic and engaging, drawing attention to specific elements within the scene.
Another important compositional tool is the rule of thirds. By dividing the frame into a 3x3 grid, you can place key elements of the photo—such as the horizon, trees, or a focal point—along these lines or at their intersections.
This creates a balanced, visually pleasing image. For example, positioning the horizon either in the upper or lower third of the frame, rather than in the center, can make the shot feel more expansive and give more room for the reflection or the sky.
Symmetry is another powerful compositional element when it comes to lake photography. Water often provides a perfect mirror, and using the reflection as a symmetrical element can create a calming, harmonious effect.
Symmetry works especially well when the water is still and the surroundings are relatively simple, but you can also break symmetry to add a sense of movement or interest. For example, positioning a tree or a boat off-center while maintaining a reflection can make the image feel more spontaneous and less rigid.
Framing your shot with natural elements in the foreground, such as branches, rocks, or overhanging trees, can also add depth to your photo. This technique draws the viewer’s eye into the frame, making the scene feel more immersive. The use of foreground elements helps to create a sense of space and can make the lake feel more distant or expansive.
Lastly, don’t be afraid to experiment with the placement of your subject within the frame. While the rule of thirds is a great guideline, sometimes centering your subject or exploring off-center placements can lead to a more compelling composition.
The goal is to guide the viewer’s eye to where you want them to focus while keeping the overall image balanced and visually satisfying. Ultimately, the composition you choose should match the mood or story you want to convey.
Post-processing tips
Even the best photos can benefit from a bit of editing to bring out the colors, details, and mood you want to convey. Here are some key steps to take during post-processing:
- Adjust exposure: Fine-tune the exposure if the image is too dark or too bright. This helps recover details in both shadows and highlights, giving the photo depth without losing important elements.
- Enhance colors: Increase contrast and saturation slightly to make the natural colors of the water and surrounding environment more vivid. Be careful not to oversaturate, as subtlety is key to keeping the image looking natural.
- Correct white balance: Adjust the white balance to correct any color casts, especially with the blues and greens of the water. Warmer tones can make the scene feel inviting, while cooler tones can create a more tranquil or moody effect.
- Sharpen reflections: If the water is calm and there are reflections, enhance them by increasing contrast and clarity. This will make the reflections stand out more and add symmetry to your composition.
- Reduce highlights or shadows: If the water is overexposed or too dark, adjust the highlights and shadows. Lowering the highlights can bring back detail in the water, while raising shadows can uncover hidden textures in the landscape.
- Remove distractions: Clean up the image by removing unwanted elements like stray objects or people. Use cloning or healing tools to seamlessly erase distractions, ensuring the focus stays on the natural scene.
- Add a vignette: A subtle vignette can draw attention to the center of the photo, emphasizing the main subject. This works especially well in lake photos where the water and reflection are the focal points.
- Enhance mood: Adjust clarity, sharpness, or add a slight contrast boost to set the emotional tone of the photo. Whether you want a soft, dreamy effect or a crisp, vibrant look, small adjustments can make a big difference.
Post-processing is about refining your images, not completely altering them. The goal is to enhance the natural beauty of the lake while bringing out the best in the colors, reflections, and atmosphere.
Common challenges and how to overcome them
One common issue is dealing with wind and ripples on the water, which can disrupt reflections and make it harder to capture a smooth surface. When the wind picks up, the water tends to create ripples, distorting the reflection and breaking the calmness of the scene.
To tackle this, try waiting for moments of stillness when the wind dies down or use a longer exposure to smooth out the surface. Using a polarizing filter can also help reduce glare and enhance reflections, even in slightly choppy conditions.
Another challenge is shooting during the wrong lighting conditions. If you're shooting around midday, the sunlight can be harsh and cause deep shadows and bright spots. To manage this, look for areas with softer light, like those in the shade or under a tree, to reduce contrast.
If that’s not possible, consider using a graduated ND filter to balance out the light between the sky and the water, especially during sunset or sunrise when the light changes quickly.
Light pollution is also an issue, especially if you're shooting near urban areas or during twilight. Artificial lights can create unwanted color casts or interfere with the natural colors of the lake.
One way to handle this is by shooting during the golden or blue hours, when the light is softer and less likely to be impacted by surrounding light sources. Alternatively, you can use post-processing techniques to correct any color shifts caused by light pollution.
Finally, when there are crowds or boats in the area, it can be tough to capture a peaceful scene. If you're dealing with people or boats, try to shoot from a different angle or wait for moments when the lake is less crowded.
If you're trying to capture a quiet, remote lake, do some research to find locations that are off the beaten path or visit during times when fewer people are around.
In the end, the key to overcoming these challenges is patience and adaptability. No two lake scenes are ever exactly the same, and each offers its own set of conditions. The more you practice, the better you'll become at reading the scene and making adjustments on the fly.