Moose photography comes with challenges, from understanding their behavior to navigating their habitats safely. In this article, we’ll cover practical tips to help you capture stunning moose photos while respecting these incredible creatures and their environment.
Getting to know Moose habits
Moose are solitary animals most of the time, which makes spotting them a unique experience. They spend a lot of their time feeding on vegetation, especially aquatic plants in wetlands and shallow ponds. Early morning and late afternoon are their most active times, so plan your shoots around these windows for the best chances of finding them.
Seasons play a big role in their behavior. During the rutting season in the fall, bull moose are more active and can be seen sparring or searching for mates. This period offers dramatic photo opportunities. In spring, you might catch glimpses of cows with their calves, which can add emotional depth to your images.
Moose are creatures of habit, often returning to the same feeding or resting areas. Pay attention to tracks, droppings, and feeding signs like stripped bark or bitten plants to locate them.
Best locations for Moose photography
These animals thrive in specific habitats, and knowing where to look can save you hours of searching. Below are some of the best regions and settings to find moose in their natural environment:
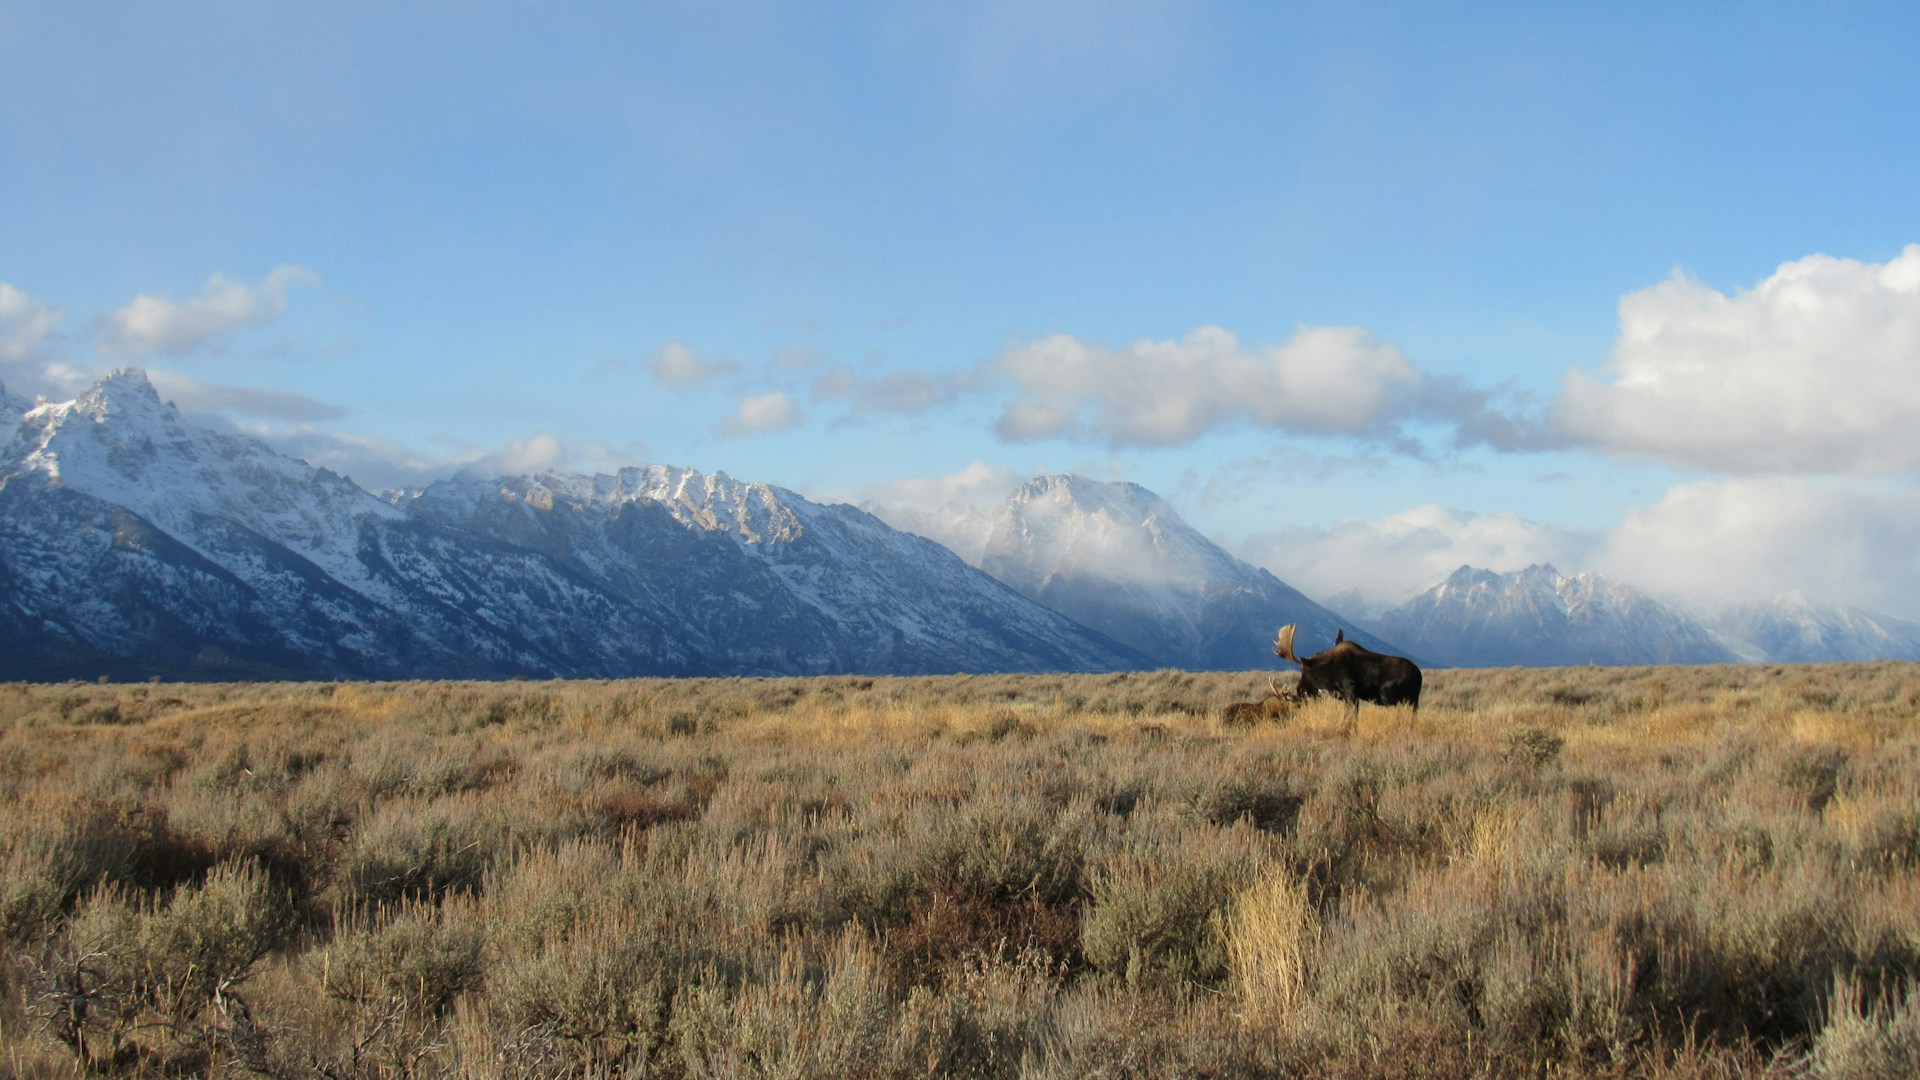
- North America’s Moose hotspots: Places like Yellowstone National Park, Grand Teton National Park, and Alaska are well-known for moose sightings. In Canada, Banff and Jasper National Parks are excellent choices, offering a mix of forests and wetlands where moose are often active.
- Scandinavia’s wilderness: Norway and Sweden are home to large moose populations. Dense forests and open clearings in these countries provide opportunities to spot moose, especially during dawn and dusk.
- Ideal habitats: Moose are drawn to wetlands, marshes, and areas with dense vegetation. Shallow ponds and rivers where they feed on aquatic plants are prime locations for photography. Keep an eye on forest edges and meadows for moose emerging to graze.
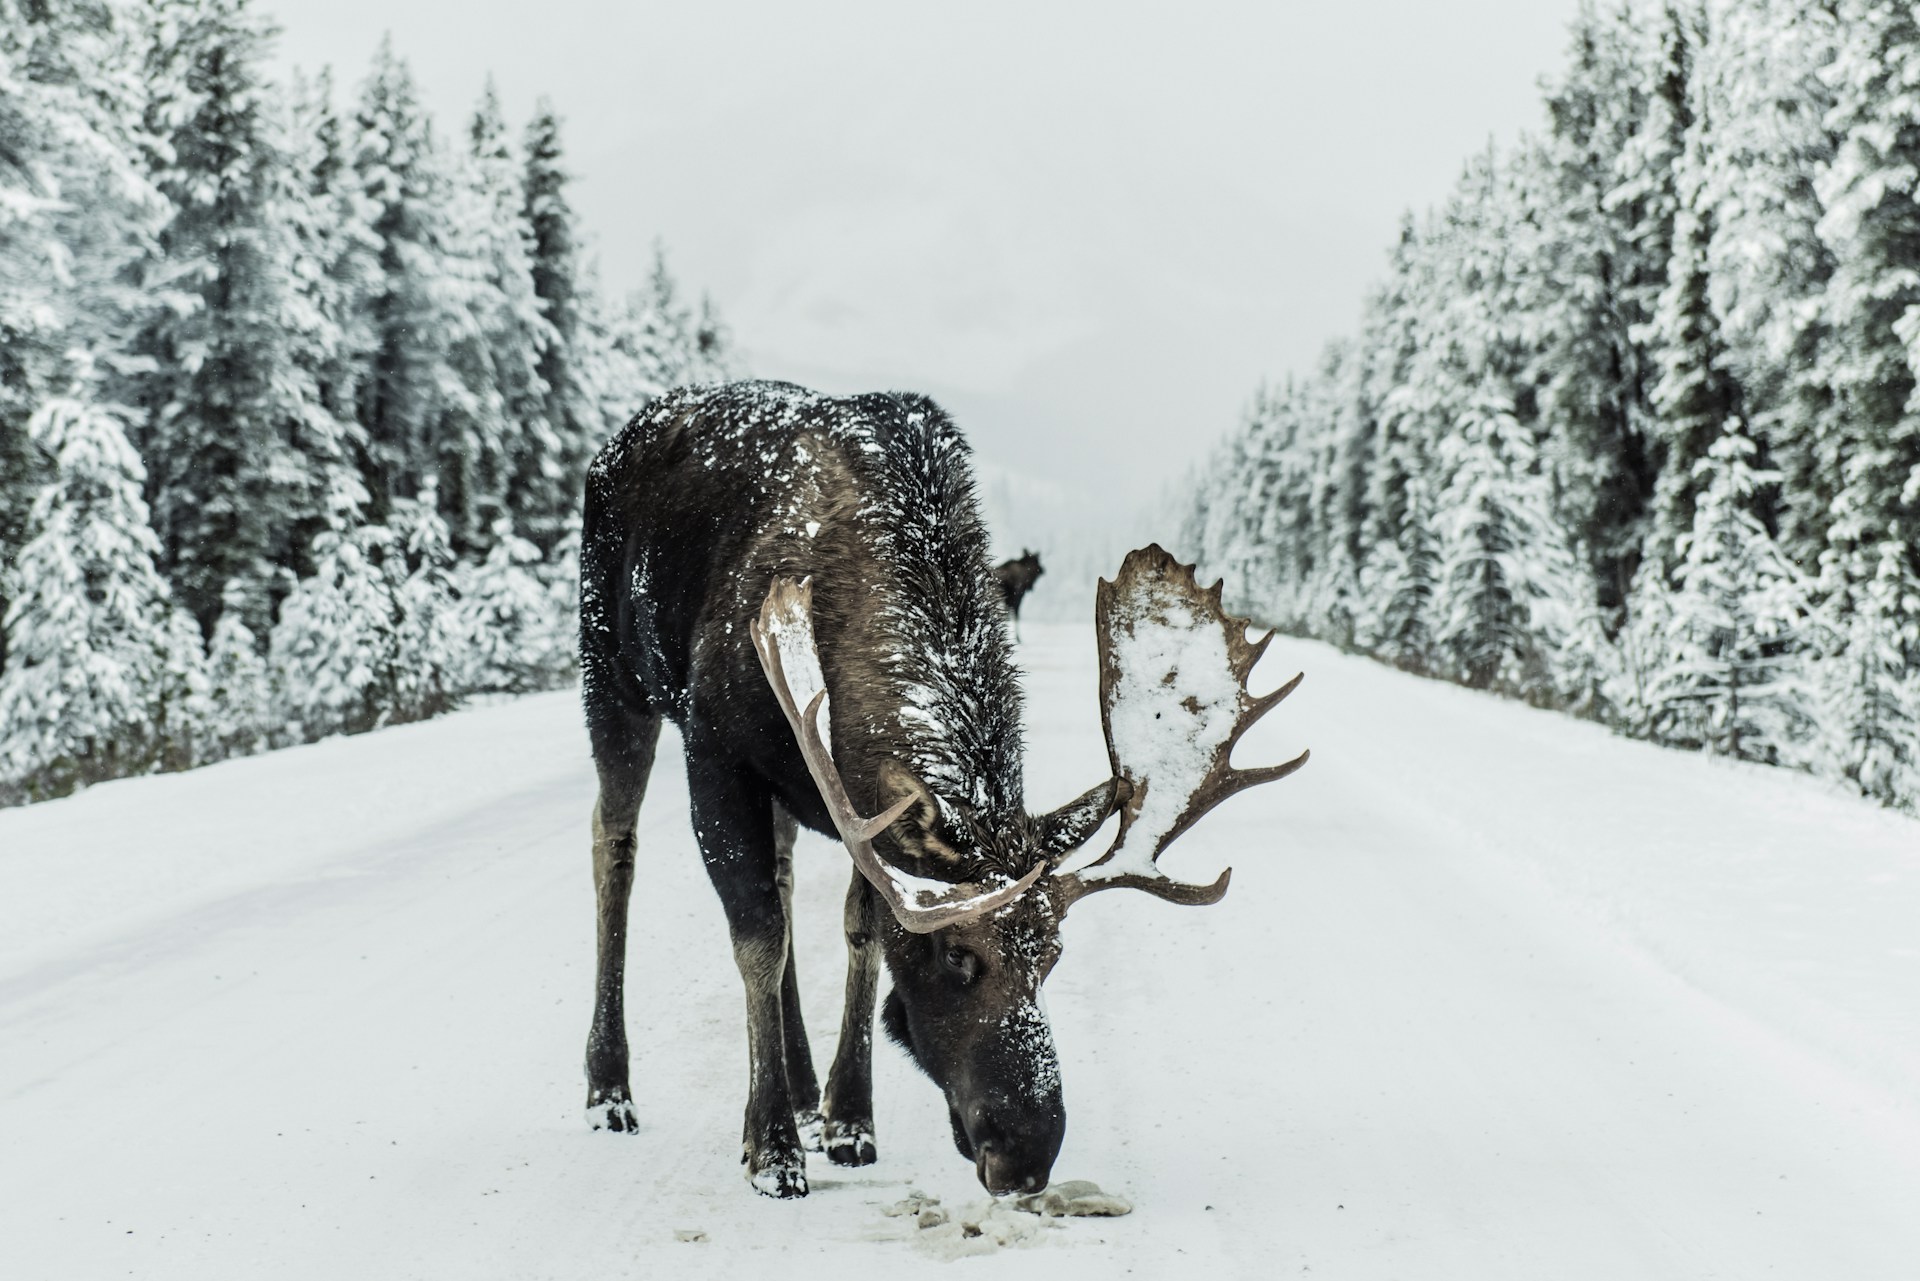
- Seasonal advantages: Summer and early fall offer the best chances to find moose near water sources, as they cool off and feed. During winter, they move to areas with less snow cover, often at lower elevations, where food is more accessible.
- Local knowledge: Talking to park rangers, local guides, or wildlife enthusiasts can give you insights into recent moose activity. They often know the best spots and can help narrow your search.
Exploring moose habitats isn’t just about finding a location; it’s about immersing yourself in their world. By seeking out regions where they thrive and paying attention to the details of their environment, you’ll set yourself up for a more rewarding experience.
Moose photography: Tips and techniques
Start by adjusting your camera settings for the situation. Moose are often found in low-light conditions. Use a wide aperture (f/4 or lower) to let in more light and create a pleasing background blur, emphasizing the moose.
Pair this with a moderate ISO setting to maintain image quality without introducing too much noise. A fast shutter speed, such as 1/500 or faster, helps freeze movement, especially if the moose is walking or turning its head.
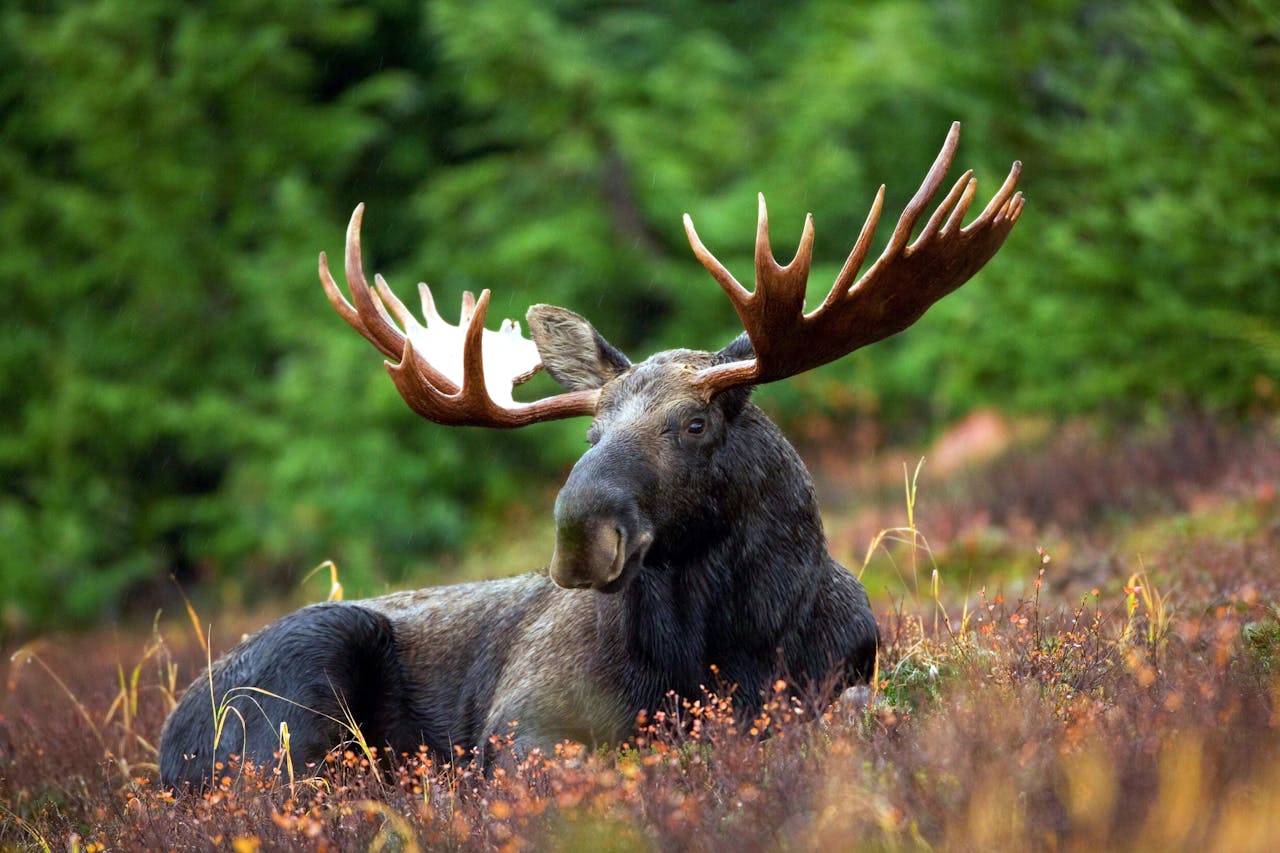
Pay attention to the light. Golden hour—the hour after sunrise and before sunset—provides soft, warm light that enhances the textures in the moose’s fur and the surrounding landscape.
If the light is harsh, position yourself so the sun is behind the moose, creating a backlit effect that highlights their silhouette and antlers. In overcast weather, use the even lighting to focus on details without worrying about harsh shadows.
Composition plays a big role in making your images stand out. Use the rule of thirds to frame the moose off-center, allowing space for them to “move into” within the frame.
If the environment is as striking as the moose itself, include it in the composition. For example, a moose standing in a misty pond or surrounded by vibrant fall foliage adds depth and context to your shot.
Be patient and observe the moose’s behavior. Wait for moments when they’re doing something unique, like feeding, walking through water, or locking antlers during the rut.
These actions add life and storytelling to your photos. Always be ready with your camera settings dialed in, as these moments can pass quickly.
Finally, experiment with different perspectives. Shooting from a low angle can make the moose appear even larger and more imposing. A side profile shot showcases the shape of their antlers, while a frontal view emphasizes their size and symmetry.
Gear recommendations
Moose size and the often remote, challenging environments where they live require equipment that is reliable, durable, and capable of capturing fine details from a safe distance. Here’s what you need to consider:
Having the right gear is crucial when photographing moose. Their size and the often remote, challenging environments where they live require equipment that is reliable, durable, and capable of capturing fine details from a safe distance. Here’s what you need to consider:
- Camera body: A camera with fast autofocus and good low-light performance is essential. Moose are most active during early mornings and late evenings, so a body with excellent ISO capabilities will help you capture sharp, noise-free images in dim conditions.
- Lenses: A 300mm to 600mm lens allows you to maintain a safe distance while filling the frame with the moose. Zoom lenses, such as a 100-400mm, provide flexibility for varying distances and compositions.
- Tripod or monopod: Stabilizing your camera is critical, especially when using heavy telephoto lenses or shooting in low light. A sturdy tripod is ideal for stationary setups, while a monopod offers more mobility for on-the-go photography.
- Weatherproofing: Moose habitats often include wet, muddy, or snowy conditions. A weather-sealed camera and lens are important for protecting your gear. Carry rain covers or waterproof bags to keep everything dry.
- Binoculars: Spotting moose from a distance can save you time and help you plan your approach. Compact, high-quality binoculars are an invaluable tool for scouting locations before setting up your shot.
- Clothing and accessories: Wear camo or neutral-colored clothing to blend into the environment. A comfortable camera strap or harness is helpful for carrying your gear over long distances. Also, pack extra batteries and memory cards since cold weather and remote locations can drain resources quickly.
Reliable equipment combined with thoughtful preparation ensures you’re ready for any situation. Invest in quality tools and take the time to know your equipment well, so you can focus on the experience and get the best possible shots.
Safety considerations
While they might seem calm and slow, they can become aggressive when they feel threatened or during specific times, like the rutting season in the fall or when protecting their calves in the spring.
The most important rule is to keep your distance. Use a telephoto lens to get detailed shots without getting too close. Moose can weigh over a thousand pounds and are surprisingly fast, capable of running up to 35 miles per hour. A startled or stressed moose can charge, and with their size and strength, they are dangerous when provoked.
Pay attention to their body language. Signs of agitation include ears pinned back, the head lowering, or stomping feet. If you notice these behaviors, back away slowly and give the moose more space.
Never position yourself between a cow and her calf or approach a bull during mating season, as these are situations where moose are particularly defensive.
Respecting their environment is also crucial. Moose live in remote, often rugged habitats. Be prepared for uneven terrain, wet areas, and variable weather. Wear sturdy footwear, dress appropriately for the conditions, and carry basic safety gear like a map, compass, and first aid kit in case of emergencies.
Post-processing tips for moose images
Start with basic adjustments. Use software like Lightroom or Photoshop to adjust exposure, contrast, and white balance. Moose are often photographed in low-light or shaded conditions, so slightly increasing the exposure or brightness can help bring out details. Adjust the contrast to make the textures in the moose’s fur and antlers stand out while keeping the overall look natural.
Fine-tune the colors. Moose are usually photographed in earthy, natural tones, so focus on enhancing these colors. Slightly boost the greens and browns if they appear dull, but avoid oversaturating, as it can make the image look unnatural.
Use the white balance tool to ensure the colors reflect the mood of the scene—cooler tones for winter settings or warmer tones for golden hour shots.
Pay attention to sharpness and detail. Moose have intricate textures in their fur and antlers that can make a photo more compelling. Use sharpening tools carefully to bring out these details without overdoing it, which can create an artificial look. Zoom in on the eyes during editing and ensure they are sharp and well-lit, as they often draw the viewer’s attention.
Use cropping to refine composition. If your photo feels unbalanced or the moose is too far away in the frame, cropping can help center the subject or improve the overall composition. Be mindful of maintaining image resolution, especially if you plan to print your work.
Control the background. Use tools to reduce distractions in the background without altering the natural feel of the photo. Adjusting clarity or applying a slight blur to the background can help keep the focus on the moose, especially if branches or other elements are competing for attention.
Finally, consider black-and-white processing for certain images. Removing color can emphasize textures, contrasts, and the moose’s form, creating a timeless, dramatic effect. This works particularly well for close-ups or images taken in snowy environments.