Motion blur photography adds a sense of movement and energy to wildlife images, turning ordinary moments into artistic expressions. By intentionally capturing motion, you can create images that feel alive and dynamic. This tutorial will guide you through the techniques and tools needed to master motion blur.
What is motion blur in photography?
Motion blur happens when moving subjects appear blurred in a photo while the rest of the image stays sharp. This effect occurs when the camera's shutter stays open long enough for movement to be recorded. Unlike accidental camera shake, motion blur is intentional and can bring a unique sense of energy and storytelling to wildlife photography.
The beauty of motion blur lies in its ability to show what a still image cannot—movement. It’s a way to capture the rush of a bird taking flight, the speed of a running deer, or even the gentle swaying of grass in the wind.
For wildlife photographers, motion blur is a chance to get creative. When done right, it can transform a simple scene into a piece of art, making your work stand out.
Key camera settings
To achieve the perfect motion blur effect, you need to get the right settings. Here’s how to set up your camera:
- Shutter speed: The key setting for motion blur. Slower shutter speeds (e.g., 1/30 or 1/60) allow more time for the subject to move across the frame, creating longer blur trails. Faster speeds (e.g., 1/500 or higher) freeze the action, but won’t give you the desired blur. Experiment with different speeds based on the speed of the subject.
- Aperture: A wider aperture (smaller f-number like f/2.8 or f/4) lets in more light, which is helpful when using slower shutter speeds. However, it will also narrow the depth of field. A smaller aperture (higher f-number like f/8 or f/11) increases depth of field, but may require a longer exposure time to compensate for less light.
- ISO: Use the lowest ISO possible to maintain image quality and avoid noise. If you’re shooting in low light, you may need to increase the ISO, but always keep an eye on the graininess it can introduce into your photos.
- Focus mode: Use manual focus or continuous autofocus. With fast-moving subjects, autofocus might struggle to lock onto your subject in time. Manual focus can give you more control, allowing you to pre-focus on a spot where the animal will pass through.
- Shooting mode: Using Shutter Priority Mode (Tv on Canon, S on Nikon) can be helpful. This allows you to choose the shutter speed while the camera automatically adjusts the aperture for proper exposure. In Manual Mode, you control both shutter speed and aperture, giving you complete control over the motion blur effect.
- Image stabilization: Turn off image stabilization when using a tripod. When shooting handheld, it can help reduce camera shake, but it can interfere with your motion blur effect when the camera is still.
Each wildlife scene is unique, and the settings you choose will depend on factors like the speed of your subject and the lighting conditions. Don’t be afraid to adjust and test until you get the effect you’re looking for.
Timing and lighting considerations
Animals are often most active during early morning and late afternoon, making these times ideal not just for lighting but for capturing dynamic motion. Pay attention to patterns in their movement.
For example, birds tend to fly in bursts, while mammals like deer or foxes might have predictable paths as they run or hunt. Knowing these rhythms helps you anticipate the action and set up your shot in advance.
Think about shadows and highlights. Directional light can emphasize movement by creating longer shadows behind a moving subject, adding depth to your composition.
Avoid situations where the light is too dim to capture details or where your subject is backlit without proper exposure adjustments, as this can make the motion blur look muddy rather than artistic.
Techniques for motion blur
These methods will help you create stunning wildlife photos that highlight motion while maintaining artistic quality.
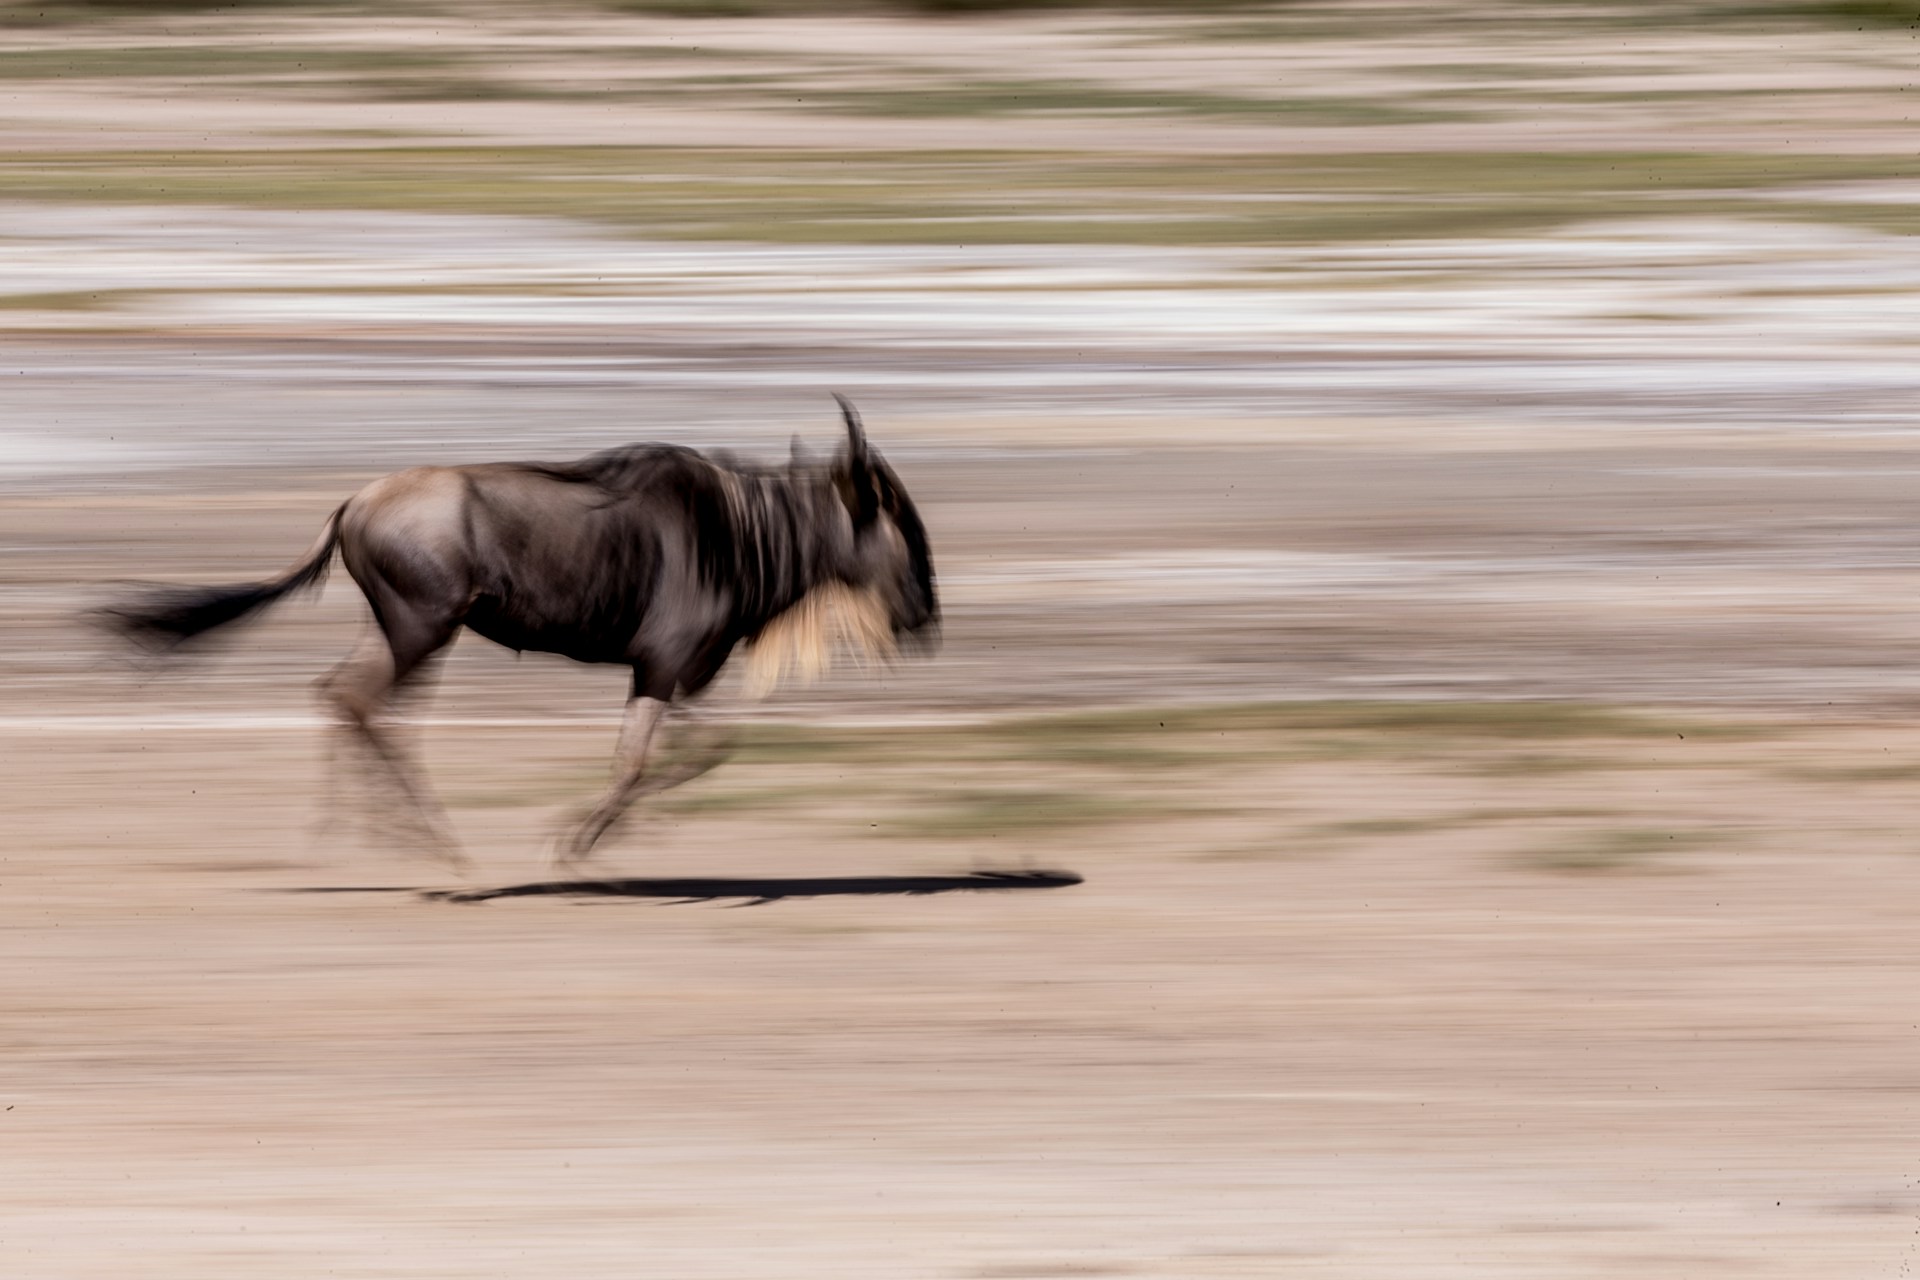
Panning technique
This involves following the movement of your subject with your camera while using a slow shutter speed. The goal is to keep the subject relatively sharp while the background blurs into streaks. To do this:
- Choose a subject moving in a predictable path, like a bird flying or a running animal.
- Use a shutter speed between 1/30 and 1/60, adjusting based on the speed of the subject.
- Practice smooth, steady movements to match the subject's pace. A tripod with a panning head can help stabilize your motion.
Zoom blur
This creative effect is achieved by zooming your lens in or out during the exposure. It works best when the subject is relatively still or slightly moving.
- Use a tripod to keep the scene steady as you zoom.
- Start with a shutter speed around 1/10 and experiment with slower settings.
- Zoom consistently and smoothly while the shutter is open to create dynamic radial streaks.
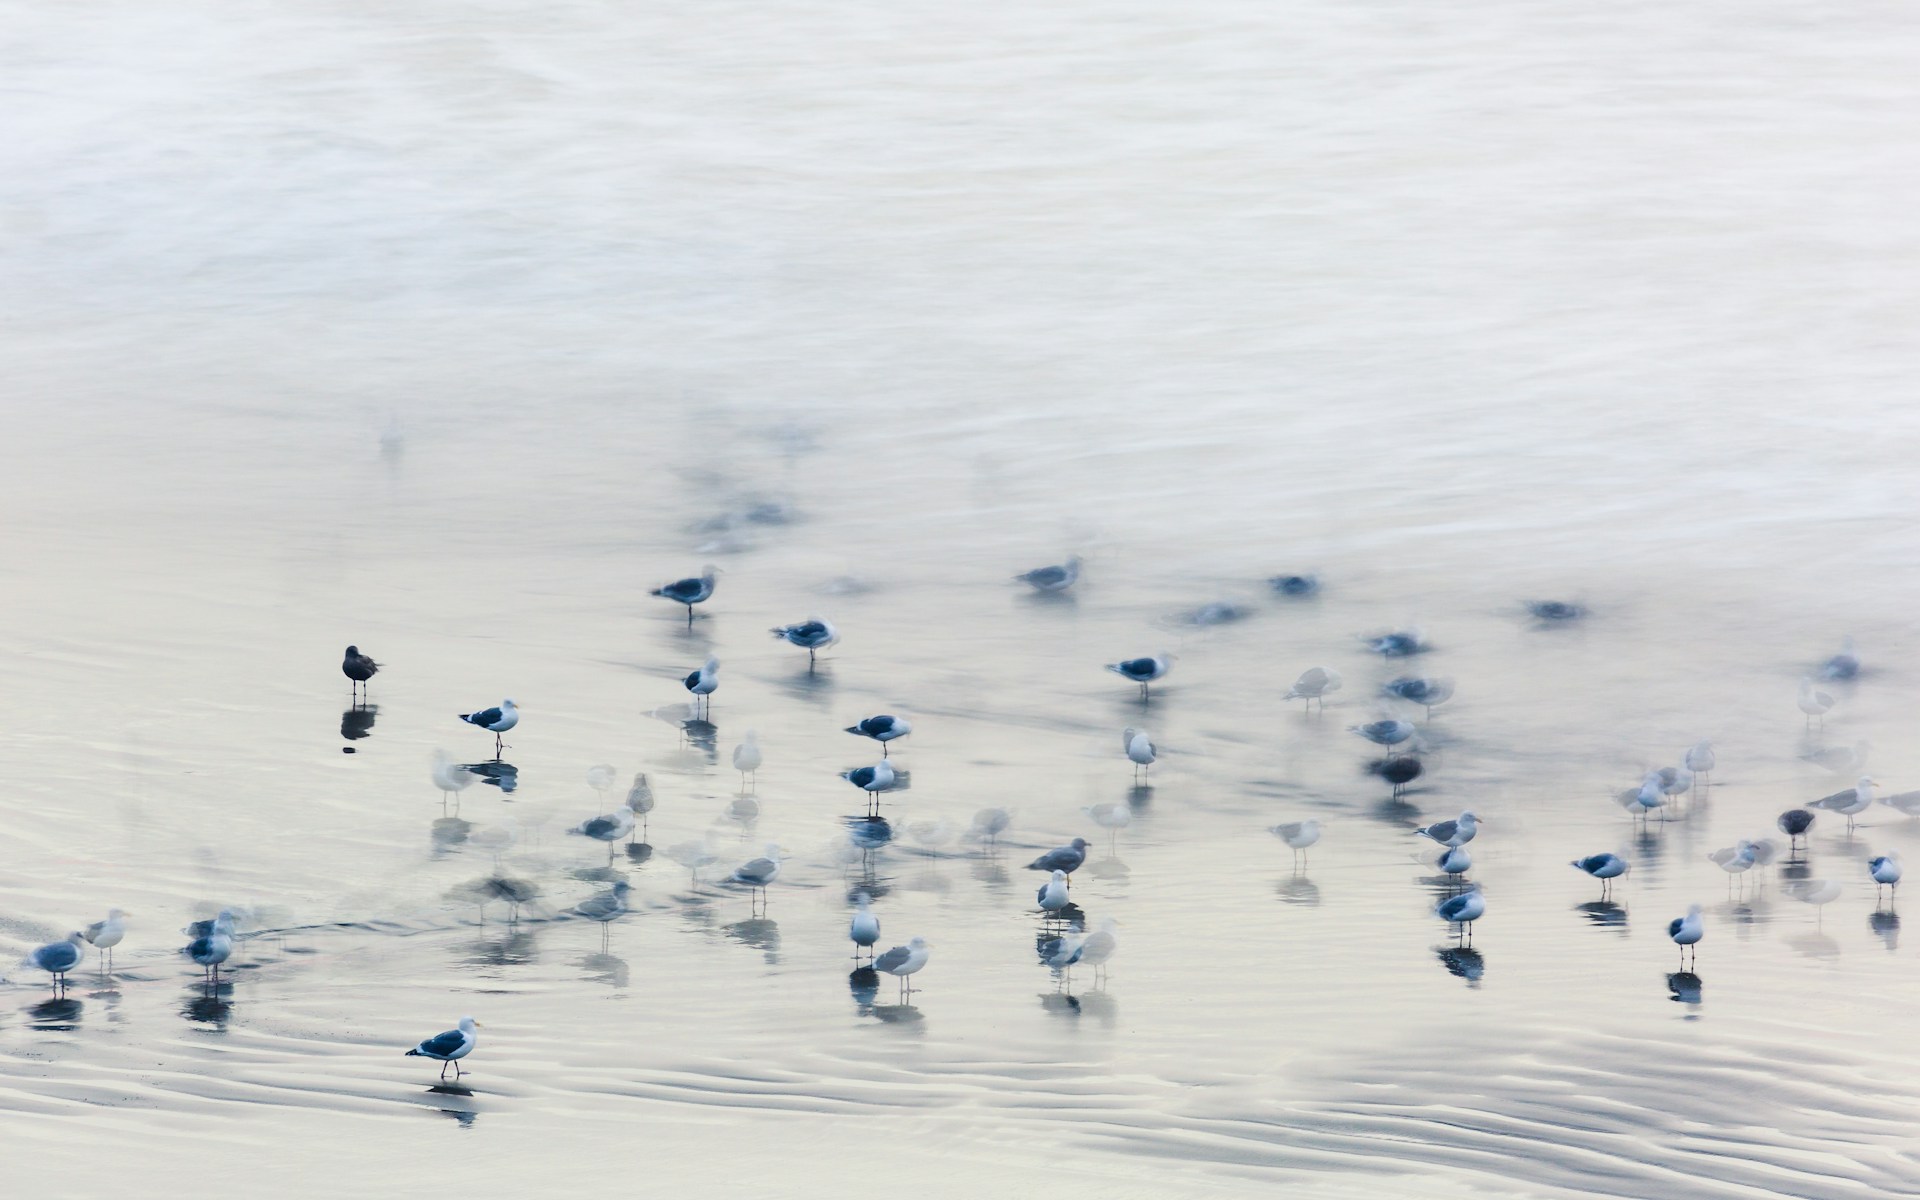
Static subject, moving background
This technique works well with subjects like perched birds or resting animals against a dynamic background, such as wind-blown grass or flowing water.
- Use a slow shutter speed to let the background blur naturally.
- Keep the camera still using a tripod and ensure the subject stays sharp by focusing manually or using autofocus.
Multiple exposures
Combine several exposures into one frame to show progressive motion. Some cameras have built-in settings for multiple exposures, or you can combine shots in post-processing.
- Use a tripod to ensure each frame aligns.
- Experiment with layering moving elements to tell a more complex story.
Each technique offers a unique way to interpret motion, and practicing these methods will help you understand when and where to use them.