Mushrooms are fascinating subjects for photography, with their unique shapes and textures. Whether you’re just starting out or want to improve your skills, capturing mushrooms in the wild requires the right tools, techniques, and an understanding of their natural environment.
This guide will cover everything you need to know to photograph mushrooms effectively and ethically, from the best gear to simple tips for getting great shots.
Essential gear for Mushroom photography
Having the right gear is crucial for photographing mushrooms. You don’t need the most expensive equipment, but having the right tools will make a big difference in the quality of your photos.
- Camera: DSLR or mirrorless cameras offer manual settings, giving you control over exposure, aperture, and focus. A good compact camera can also work, but it will limit your creative flexibility. Look for a camera that allows you to adjust settings like ISO and shutter speed.
- Lenses: Macro lenses allow you to focus on small details like the texture of the cap or the gills, even when the subject is very close. A lens with a focal length of 50mm to 100mm is perfect for capturing mushrooms up close. If you want to include more of the environment, a wide-angle lens (between 24mm and 50mm) will help capture the scene without losing focus on the mushrooms.
- Tripod: A tripod is essential, especially in low-light conditions or when using a small aperture to get more depth of field. It helps keep your camera steady and reduces the chance of blurry shots. Look for a lightweight, compact tripod that’s easy to carry while hiking in the woods or fields. Some tripods even come with adjustable legs to help you shoot at different angles.
- Reflectors and diffusers: Natural light isn’t always perfect for photographing mushrooms. A reflector can help bounce light onto the subject, highlighting details and softening harsh shadows. A diffuser can soften strong sunlight, reducing glare and giving you even, soft lighting. These tools are especially useful when shooting in direct sunlight or on bright days when shadows can be distracting.
- Portable light source: If you find yourself shooting in low-light conditions, a small LED light can be a game-changer. These lights are easy to carry and can help you add extra light to darker areas, such as under trees or in shaded spots. Look for a light with adjustable brightness so you can control the intensity of your shots.
Keep in mind that with a little practice and patience, you can achieve stunning results without needing the latest equipment.
Understanding Mushrooms and their environment
Mushrooms come in many shapes, sizes, and colors, each species offering unique photographic opportunities. Some have smooth caps, while others have textured surfaces, and some glow in the dark while others blend seamlessly with their surroundings.
Taking time to learn about the mushrooms in your area, whether through field guides or online resources, will not only help you identify them but also give you insight into how best to capture their unique features.
Mushrooms grow in various habitats, such as forests, grasslands, meadows, and wetlands, and each environment presents different challenges and opportunities for photography.
In dense forests, mushrooms are often found growing on decaying wood or moss-covered ground, providing a rich, textured backdrop for your shots. In open meadows, mushrooms may appear in clusters, standing out against the green grass, offering a more open and expansive composition.
Lighting conditions can be tricky when photographing mushrooms, as they are often found in shaded areas like under trees or on the forest floor. Natural light is ideal for capturing the true colors and textures of mushrooms, but direct sunlight can lead to harsh shadows and overexposure.
Cloudy days, on the other hand, offer softer, more even lighting, making them perfect for mushroom photography. If you're shooting in direct sunlight, consider using a reflector or diffuser to soften the light and reduce harsh contrasts.
Early mornings or late afternoons are often the best times to shoot, as these times provide softer, warmer light that reveals the subtle details of the mushrooms and their surroundings. In the morning, mushrooms can also be more vibrant, especially after dew has settled on them, adding a beautiful touch to your images.
Composition tips for photographing Mushrooms
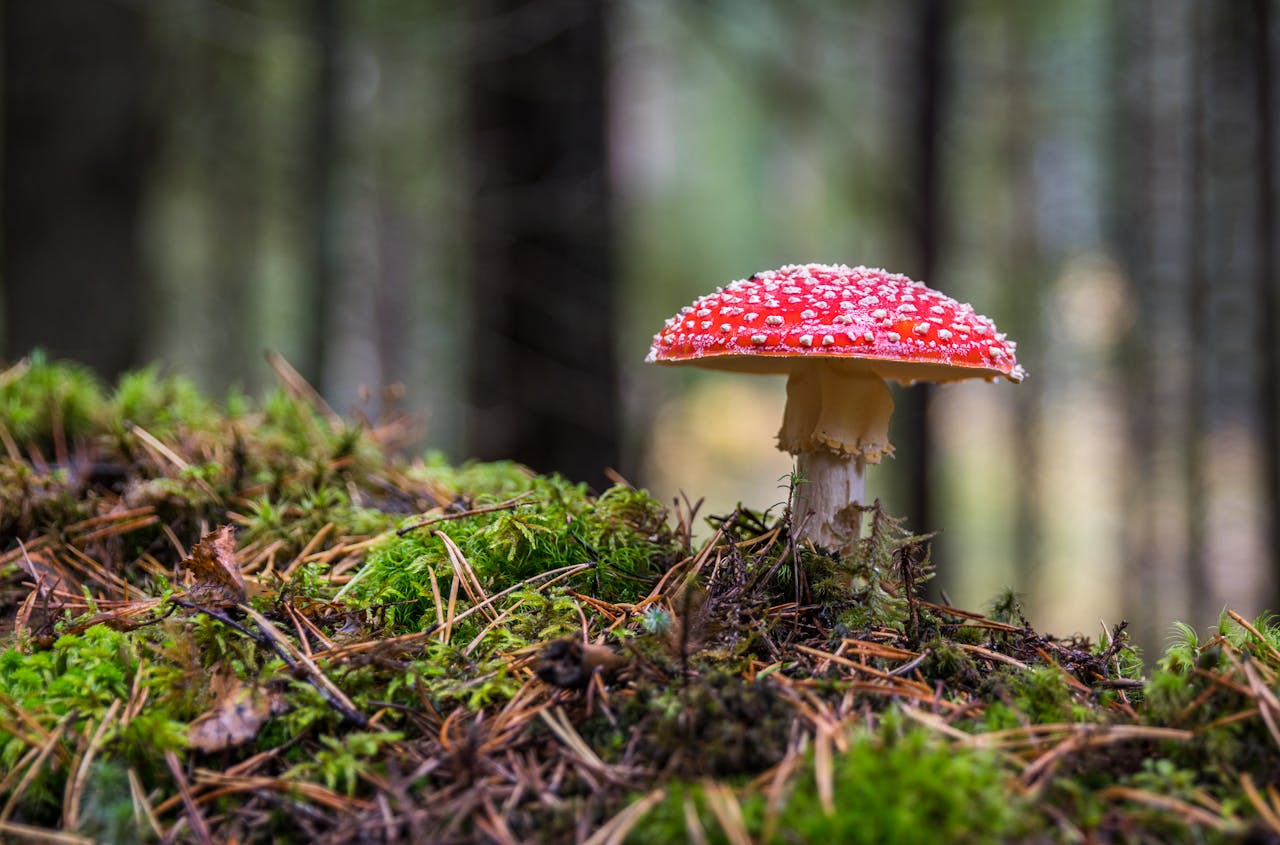
Start by getting low. Mushrooms are close to the ground, so crouching or lying down will give you the best angle to highlight their size, texture, and shape.
Shooting at their level or from slightly below can make the mushroom look more dramatic and help it stand out in the frame. Avoid taking shots from directly above unless the cap has interesting details that you want to highlight.
Pay attention to your background. A clean, uncluttered background helps the mushroom stand out. Look for areas of soft, blurred foliage, moss, or fallen leaves. To achieve this effect, use a wider aperture (a smaller f-number like f/2.8 or f/4) to create a shallow depth of field.
This keeps the mushroom sharp while blurring the background, removing distractions and drawing attention to your subject. If the background feels busy or overwhelming, shift your angle slightly to find a cleaner view.
Think about framing and placement. Using the rule of thirds can add balance and interest to your photos. Imagine your frame divided into three equal sections, both vertically and horizontally. Place the mushroom along one of these lines or at an intersection point rather than in the center of the frame. This small adjustment can make the composition feel more natural and visually pleasing.
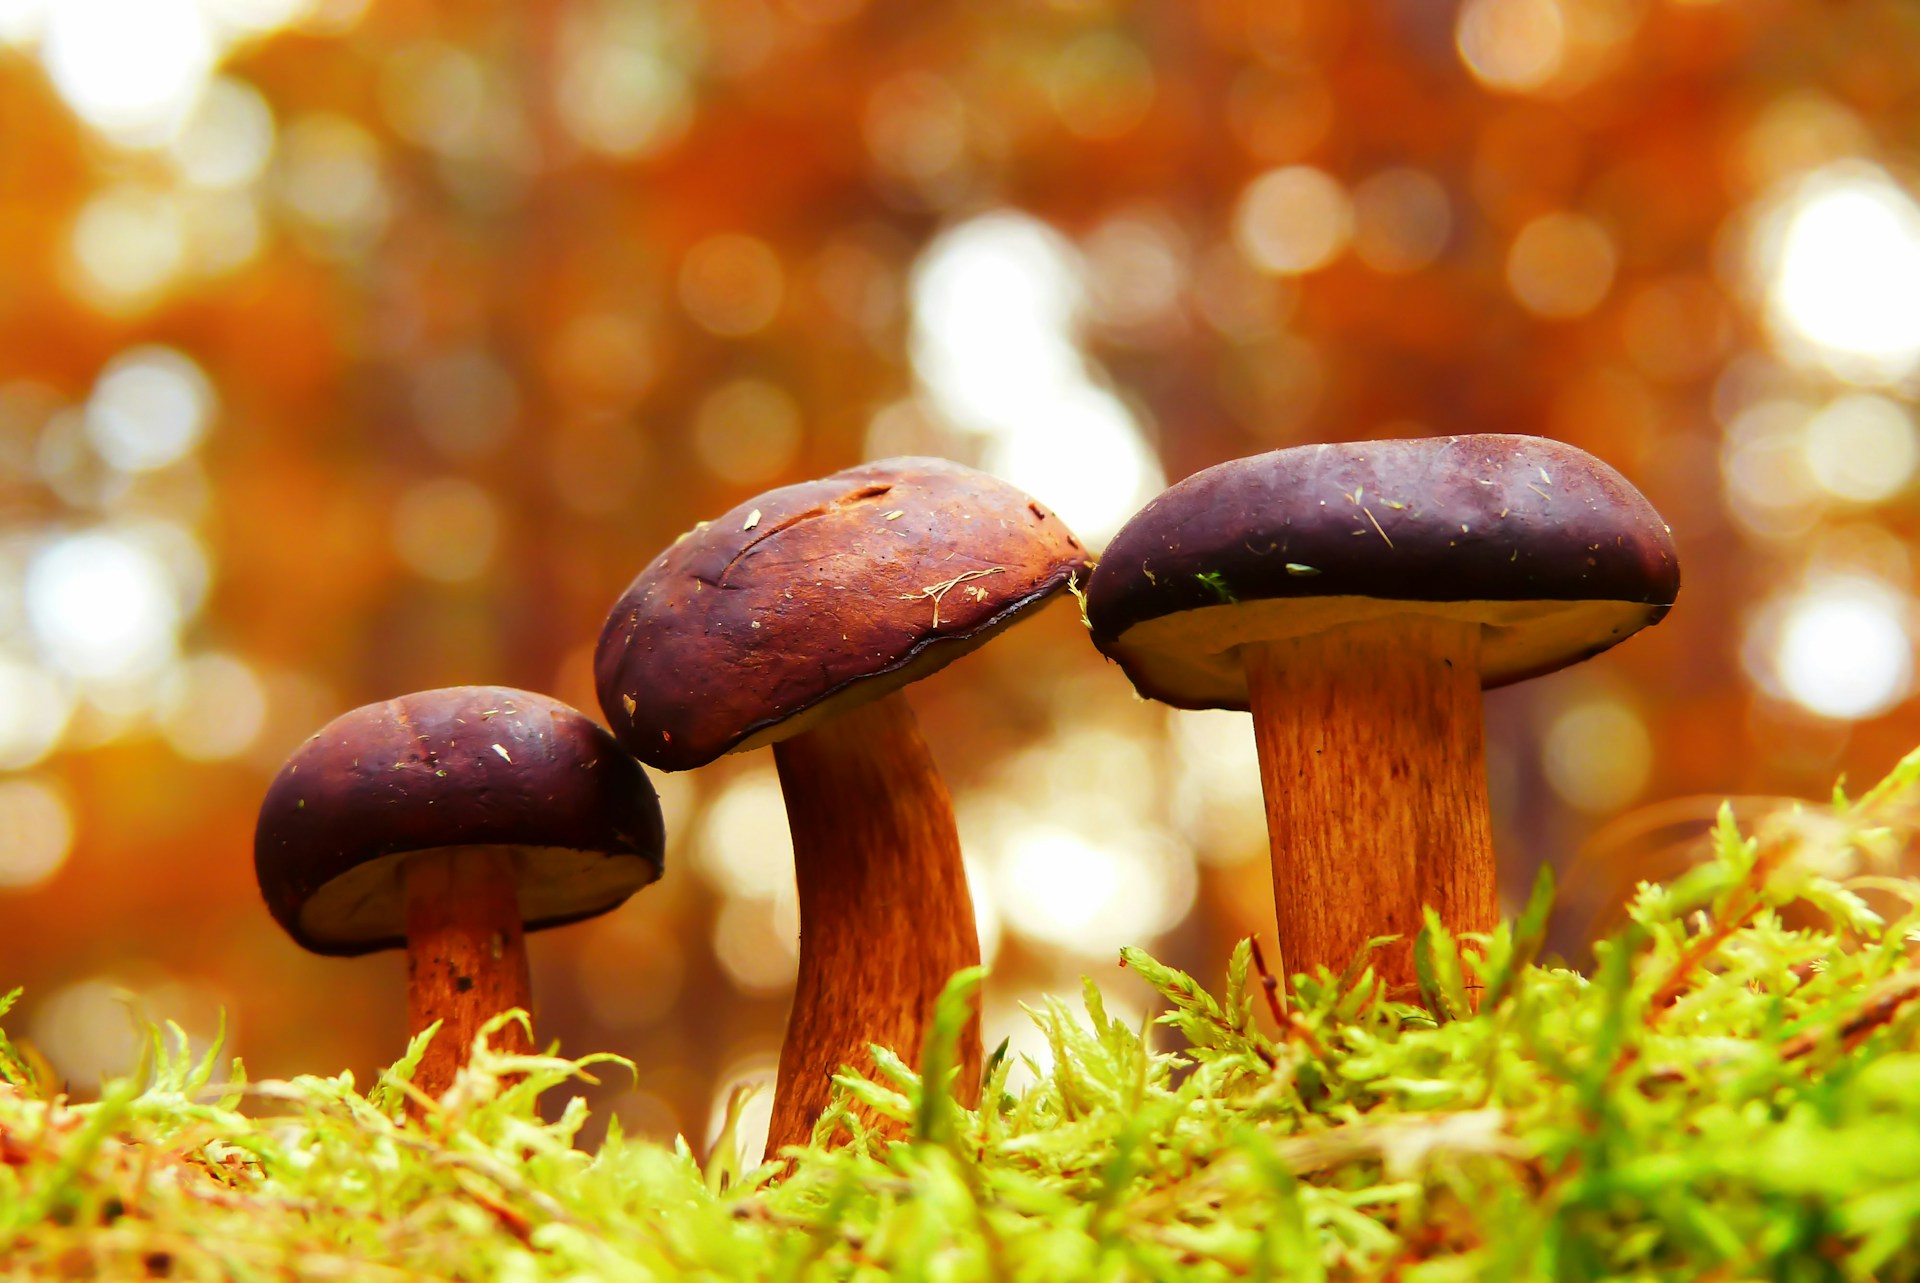
Experiment with different perspectives. A side angle can reveal the mushroom's stem and gills, while a closer shot from below can emphasize its structure. Take time to explore how light hits the mushroom from different directions. Side lighting can highlight textures and details, while backlighting can create a soft glow or make fine features like edges or gills stand out.
Look for details and surroundings. Mushrooms often grow in beautiful, textured environments like moss, fallen leaves, or damp forest floors. Including parts of the environment can add context and depth to your shot. For example, you could frame the mushroom with nearby plants or capture dew droplets on its surface for added interest.
Finally, take a step back and check your composition before pressing the shutter. Look for distracting elements, like twigs or bright spots in the background, and make small adjustments to improve the shot.
Post-Processing tips
Start with exposure. Mushrooms are often photographed in low light, so the image might appear darker than you want. Use editing software like Lightroom, Snapseed, or Photoshop to brighten the photo slightly while keeping shadows and highlights balanced. Be careful not to overexpose the image, as this can wash out details or colors.
Next, focus on the contrast. Increasing contrast helps define the textures and shapes of the mushroom, making them stand out more against the background. Adjust it in small steps until the details of the cap, gills, or stem are clear but still look natural.
Work on the color balance to ensure the tones in your photo look true to life. Forest lighting can sometimes add blue or green tints to your image. Use the temperature slider to warm up or cool down the image as needed, and adjust saturation or vibrance to bring out subtle colors in the mushroom without making it look unnatural. Avoid oversaturating the image, as mushrooms often have earthy, muted tones that should remain soft and realistic.
Fine-tune the sharpness to bring out textures, such as the gills, stem, or surface of the mushroom. Most editing software has a sharpening tool that enhances details. Apply this effect gently, as over-sharpening can add grain or make the photo look unnatural. If needed, use noise reduction to smooth out grainy areas, especially in darker parts of the photo, but don’t overdo it or you’ll lose important details.
Check the cropping and composition. If there’s unnecessary space around the mushroom or distracting elements near the edges, crop the photo to improve focus on your subject. Stick to natural framing that keeps the mushroom as the central point of interest without feeling cramped.
Lastly, evaluate the final image. Compare it to the original photo to make sure you haven’t over-edited. The best mushroom photos should look clean, natural, and true to the environment where you found them.
Common challenges and how to overcome them
Low light is one of the biggest issues, especially in shaded forests. Use a tripod to stabilize your camera for longer shutter speeds and avoid blur. If you need more light, a portable LED light or reflector can brighten the scene without altering the natural look.
Focusing Issues can occur when working close to the ground or dealing with tiny details. Switch to manual focus to control exactly where the sharpest point is, especially on textured caps or gills. If your camera allows, use focus peaking or live view to fine-tune the focus.
Unstable Ground can make it hard to set up your tripod or get a good angle. Look for a stable base like a rock or firm patch of soil, and adjust your tripod’s legs individually to keep it level. If you don’t have a tripod, rest your camera on your bag or another steady surface to minimize shake.
With patience and problem-solving, these challenges become opportunities to improve your skills. The key is staying flexible, adjusting to the environment, and working carefully to capture the natural beauty of mushrooms.