Rainy days can transform ordinary scenes into something magical. While it might seem like a challenge, with the right approach, it can become one of your best tools for capturing emotion and atmosphere. This guide will help you make the most of rainy weather, from preparing your gear to finding creative ways to tell a story through your photos.
Preparation before heading out
Start by ensuring your camera and lenses are safe from water damage. Use a rain cover designed for your camera, or improvise with a plastic bag if needed. Keep a microfiber cloth handy to wipe away droplets, as even a small amount of water on your lens can ruin a shot. A lens hood can also help shield your lens from rain, reducing the chances of water spots.
Carrying your equipment in a waterproof bag is crucial. This will keep everything dry and organized, even if the rain gets heavy. Bring along a few resealable plastic bags for small items like batteries and memory cards. Speaking of batteries, cold and wet weather can drain them faster, so pack extras to avoid running out of power mid-shoot.
Wear waterproof clothing, including a jacket with a hood, sturdy boots, and gloves that allow you to operate your camera easily. Also check the weather forecast to understand the conditions you’ll be facing, and choose a location where rain adds character to the scene.
Composing rainy day shots
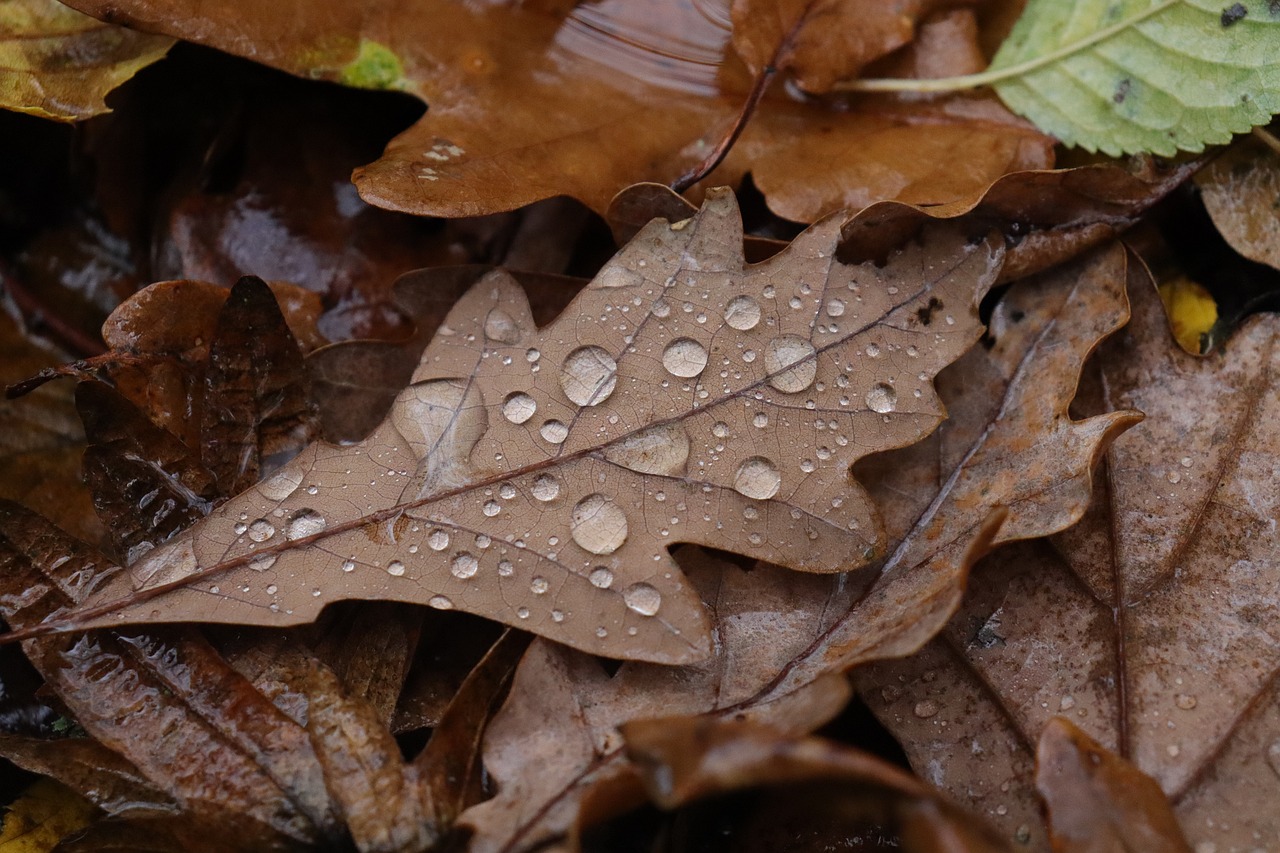
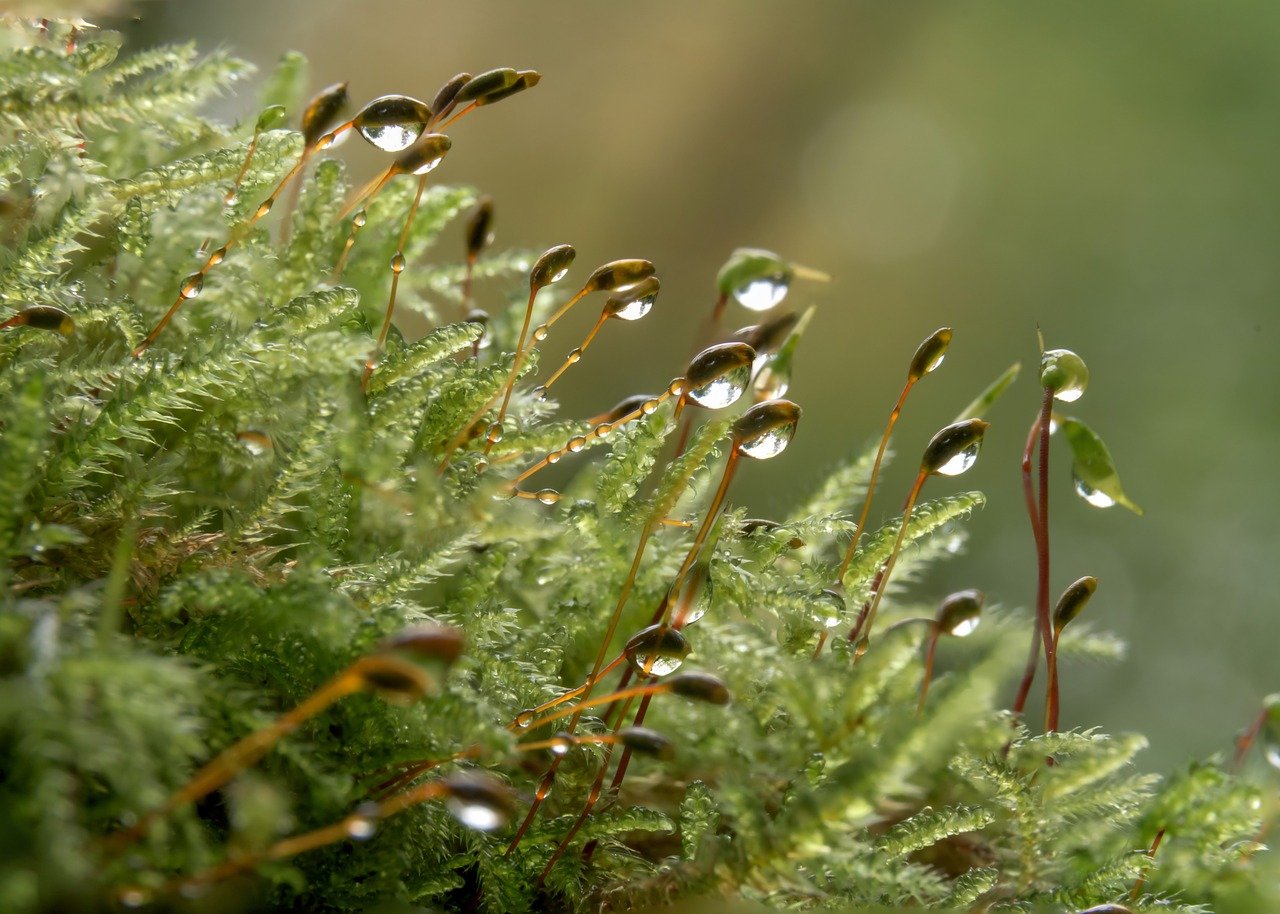
Wet surfaces are a great place to start. Rain enhances textures on everything it touches, from tree bark and leaves to pavement and stone. By focusing on these details, you can capture the richness and depth that rain brings to a scene. Look closely at how light interacts with the water—shiny surfaces can create interesting contrasts and add visual interest to your shots.
Reflections are another powerful tool in rainy day photography. Puddles often act as natural mirrors, offering a chance to include a second layer to your composition. Position yourself so the reflection complements your main subject or use it to create symmetry. Changing your angle slightly can completely transform how the reflection interacts with the scene, so take your time to experiment.
Rain also creates atmosphere, which you can use to enhance the mood of your image. Mist or light fog adds depth, softening distant elements and making the scene feel layered. Pay attention to how rain interacts with the background as well—it can blur or soften distractions, drawing the viewer’s focus to your subject.
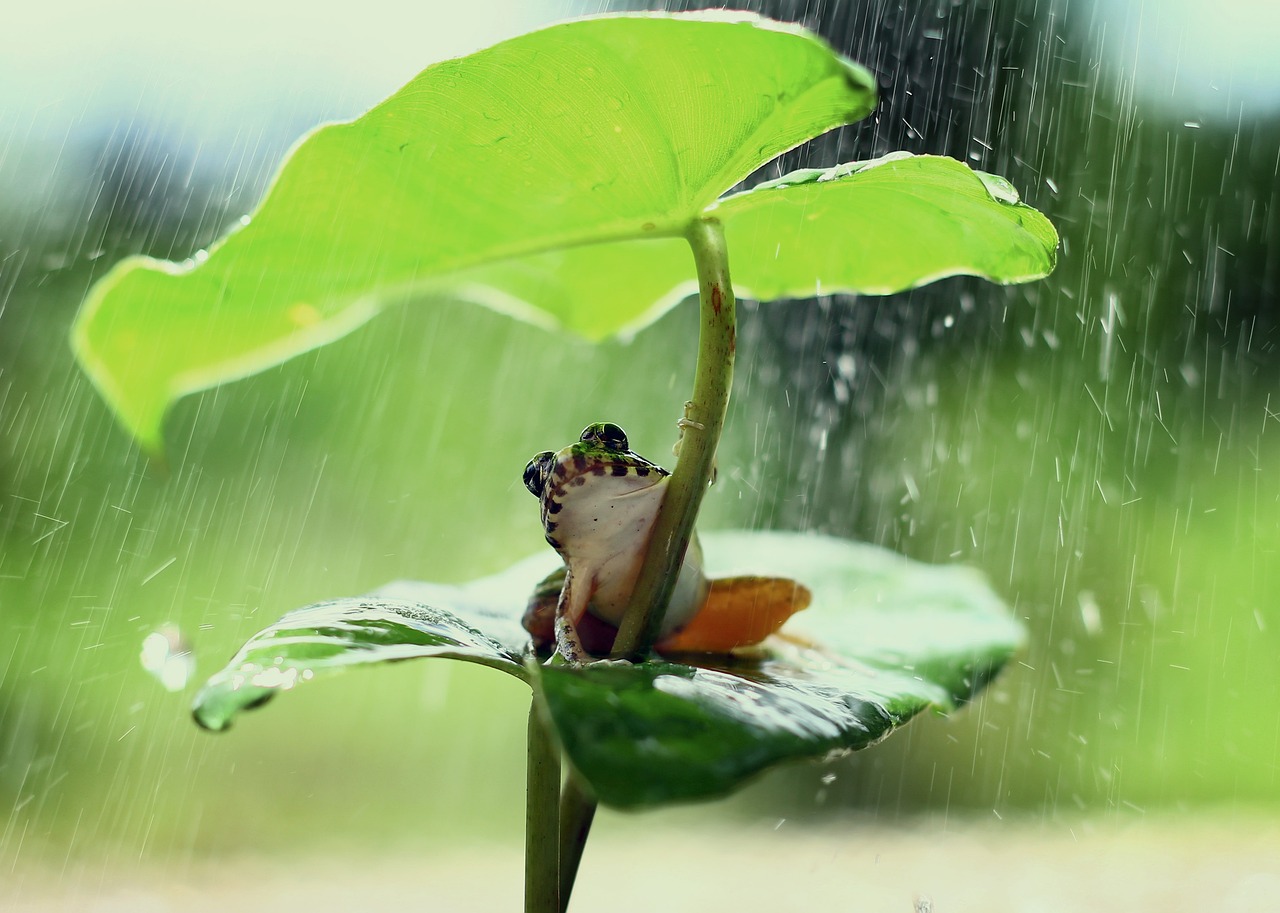
Incorporating wildlife into your rainy shots can add dynamic movement or an element of surprise. Think about how these subjects interact with the rain and frame them to highlight their connection to the environment.
Creative opportunities in rainy weather
One of the best opportunities lies in macro photography. Rain creates intricate patterns of droplets on surfaces like leaves, flowers, or windows. These small details can be mesmerizing when captured up close. Look for raindrops clinging to spiderwebs or pooling on textured surfaces.
Rainy conditions are perfect for exploring motion and atmosphere. Slow down your shutter speed to capture the streaks of falling rain, adding a sense of movement to your image. Pair this with a static subject to create contrast. Mist and fog often accompany rain, giving your photos a soft, dreamlike quality. Use these elements to layer your shots, adding depth and mood that bring your scene to life.
Colors often appear more vibrant in wet conditions, making them stand out against the muted tones of a rainy background. Use these pops of color to draw the viewer’s eye and add energy to your composition. The contrast between the vivid colors and the subdued surroundings can create striking images.
Rain is also a storyteller, evoking emotion and creating drama. Use the rain as a way to highlight these stories, focusing on how the weather interacts with your subjects.
Key technical considerations
By understanding how to work with these conditions, you can turn potential difficulties into creative opportunities. Here are the key technical considerations to keep in mind:
- Exposure settings: Rainy conditions are usually darker, so you might need to increase your ISO to let in more light. Keep it as low as possible to avoid noise, but don’t hesitate to raise it when necessary. A slightly slower shutter speed can also help bring in more light, but be mindful of movement in the scene that could cause blur. Use a wider aperture if you need more light, but balance it with the depth of field you want for your shot.
- Shutter speed and raindrop effects: Adjusting your shutter speed allows you to decide how you want to capture the rain. A fast shutter speed will freeze individual droplets, creating a crisp effect, while a slower speed can blur the rain, giving a sense of motion and atmosphere. Experiment with different speeds to see what works best for your vision.
- Focus techniques: Rain can reduce contrast, which can confuse autofocus systems. If your autofocus struggles, switch to manual focus and carefully adjust it to your subject. Raindrops on your lens can also interfere with focus, so keep your lens clear and avoid focusing through a wet surface unless it’s part of your creative intent.
- Using available light: Overcast skies offer soft, even light that works well for many types of photography. Embrace this by looking for subjects where the diffused light brings out details and textures. Reflections from wet surfaces can create natural highlights, so position yourself to capture these subtle effects.
In rainy weather, technical precision matters even more, as small adjustments can dramatically change the outcome of your images. Stay flexible and adapt to the conditions as they shift. Use the rain as a creative element rather than seeing it as a limitation, and you'll find that some of your most striking shots come from the times when you’re willing to experiment.
Post-processing techniques
Post-processing is where you bring out the full potential of your rainy day photos. By focusing on details and using editing tools carefully, you can turn a good photo into a great one.
- Enhance textures and details: Use clarity and sharpness adjustments to emphasize droplets on surfaces, wet leaves, or rough textures. Be cautious not to overdo it, as excessive sharpening can make your image look unnatural. Focus on bringing out the details that matter most.
- Control reflections and highlights: Use tools like the highlights slider to tone down overly bright areas and balance the exposure. This helps keep the viewer’s focus where you want it while preserving the overall atmosphere of the scene.
- Adjust color and mood: Cool tones can emphasize calmness or solitude, while warm tones can create a cozy or nostalgic feel. Experiment with split toning or color grading to subtly shift the mood of your image. For vibrant scenes, boost saturation carefully to make colors pop without losing realism.
- Work with shadows and contrast: You can add depth by slightly increasing contrast or adjusting shadows and blacks. This brings out details in darker areas and gives the image a more dynamic look. Be mindful of keeping the natural feel of the lighting intact.
- Handle noise reduction: Use noise reduction tools to smooth out grainy areas, especially in the sky or background. Strike a balance between reducing noise and preserving fine details in your subject.
- Creative effects: Enhance bokeh effects by subtly brightening light points in the background or blurring areas to highlight your subject. You can also use selective adjustments to draw attention to specific parts of the image, such as a reflection or a droplet.
Post-processing is not just about fixing issues but about enhancing what the rain has already given you. Approach each photo individually, paying attention to the unique elements that stand out.